Removing disconnected mailboxes in Exchange Server 2007
Hello folks,
Exchange Server 2007 doesn't allow us to purge the disconnected mailbox. In order to remove one or multiple disconnected mailboxes we can be performing these steps:
Recovery starts with knowing which solution you need to reclaim the lost data. File recovery is the most common one but advanced users often rely a a partition product if the circumstance allows it. Service is for a failing hard drive.
coming "The server is unwilling to process the request. (Exception
from HRESULT: 0x80072035) trying to remove a user from group". I'm
giving a code block here:
//change group membership
//first remove user from other groups
ArrayList arlGroups = GetGroups(LoginID, false);
DirectoryEntry oGroupToRemove = new DirectoryEntry();
for (int i = 0; i < arlGroups.Count; i++)
{
string sGroup = arlGroups.ToString();
sGroup = sGroup.Substring(0, sGroup.IndexOf(","));
string[] split = sGroup.Split(new Char[] { '=' });
sGroup = split[1].ToString();
oGroupToRemove = oDirEntry.Children.Find("CN=" + sGroup, "group");
//THE NEXT LINE IS CAUSING THE EXCEPTION
oGroupToRemove.Properties["member"].Remove("CN=" + LoginID);
oGroupToRemove.CommitChanges();
oGroupToRemove.Close();
}
//add member to the given group
DirectoryEntry oGroup = new DirectoryEntry();
oGroup = oDirEntry.Children.Find("CN=" + GroupName, "group");
if (oGroup != null)
{
oGroup.Invoke("Add", new object[] { oUser.Path.ToString() });
}
oGroup.CommitChanges();
oGroup.Close();
Please help me as soon as possible.
Thnx in advance
Issue: Custom Tab not showing up
OCS Platform: OCS 2007 R2 Standard running on Windows 2008
OS/Client Running Windows Vista x32 with MOC 2007 R2.
Application: Response Group app.. Configured my MOC user as a a formal
agent
as per the Microsoft R2 guide for the Custom tabs I Created local tab.xml file and configured registry to point to it per
MS documentation:
I am able to browse to both the PNG and tab.aspx using I.E without
prompts or warnings. Has anyone run across this?
The Problem was simply with the below line :
<contactid>false</contactid>
In the original Microsoft guide it is mentioned to write <contactid>true</contactid> in the XML file , simply change it to false and it will work fine.
I opened a ticket w/ Microsoft and here is their answer I received in bold. Basically The RTC Team reassigned the purpose of ContactID and removed the OnSelectionChange Function. So there are no more dymanic tabs in which you can send the contact SIP URI to a webpage and update your tab – now there is only static web pages . Also the OCS R2 documentation is incorrect in that it states OnSelectionChange is still avaiable but it is not. Also RTC went back to using GET and POST statements on the Contact Cards which open up a web browser.
Microsofts Replies
The Communicator R2 client tab functionality has changed from what it was in Communicator 2007. In OC 2007 you could pass the contactID parameter to tabs that were listed at the bottom of the Communicator contacts display. Microsoft has changed the use of tabs in OC 2007 R2 such that you can only display static tabs at the bottom of the Communicator contacts display area. The previous functionality has been moved to the tabs at the bottom of the contact card for each user. So if you wanted to access contact sensitive data you need right-click on the user and choose “View Contact card”.
See Configuring Custom Tabs in Communicator 2007 R2
ELEMENT contactid (“true” | “false”)
Determines whether the tab appears in the contact card. Tabs defined without contactid or with contactid=false will appear only in the Communicator window. Tabs defined with contactid=true will appear in the contact card, and Communicator will pass the selected contact to the defined page. The default value is “false.”
If you have set
true => the tabs that would normally be present at the bottom of the OC 2007 display area is now moved to the contactcards, and then the contact sip URI will be passed to the tabs that now appear in the contact card.
Here is a statement from RTC Core:
In R2 the extensibility of Communicator enforces a more strictly defined user experience. In our product roadmap going forward, the Contact Card will gain prominence, and in order to prepare for those upcoming changes, we slightly modified the API behavior of the Custom tabs to display tabs using the ContactId=true to appear in the Contact Card and to be contact specific.
토스카 프리미엄6의 외관, 익스테리어에 대해서는 비교적 호불호가 분명한 편입니다. 가장 무난하다는 평가를 받고 있는 중형차의 레퍼런스 격인 경쟁회사의 소나무 시리즈의 경우, 남녀노소를 가리지 않고 느낄 수 있는 평범함, 깔끔함에 역시 대중카 다운 면모를 과시하는 편이고, 얼마 전 환골탈태한 로또 이노베이션 같은 경우는 예쁘다 혹은 어색하다를 떠나서 공통적으로 차가 좀 작아보인다는 이야기를 많이 하는 편입니다. 같은 패밀리룩을 가지고 있는 준중형인 포르x 역시 마찬가지고요.(테 자에다가 x 표시를 해놓으니 이거 좀 이상하군요.^^;;) 르노의 슴5는 상당히 여성취향적인 것 같습니다. 대체적으로 여성들은 예쁘다고 하는 반면, 남성들의 경우는 개구리-_- 닮았다는 얘기를 종종 하더군요. 물론 이런 부분은 지극히 개인적이고, 감성적인 부분이기 때문에 그것이 반드시 옳다, 혹은 그게 대세다, 진리다 라고 얘기하긴 어렵습니다.
이런 의미에서 봤을 때 토스카 프리미엄6의 외관은 상대적으로 호불호가 명확한 편입니다. 단적인 예를 보더라도 토스카 특유의 쫙 찢어져서 올라간 헤드라이트의 모양을 가지고도 남성적이고 역동적이어서 마음에 든다 쪽과 BMW의 5시리즈를 그대로 차용한 것이라 독창성이 떨어진다에서부터 예쁘지 않다, 어색하다 등 다양한 이야기를 하곤 합니다.
그러나 제 개인적으로는 오히려 토스카의 외관은 지나치게 역동적이고 튀어서 비주류일 수 밖에 없지 않나 싶습니다. 4기통에 4단 오토 미션이 전체의 90%를 차지하고 있는 국내 2000cc급에서 6기통 엔진에 6단 오토미션을 가지고 있는 토스카는 파워트레인에서부터 비주류의 길을 걷고 있는데, 그 외관 역시도 동급의 다른 모델에 비해 너무나 다른 지향점을 가지고 있기 때문에 역시나 비주류가 될 수 밖에 없지 않는가 하는 생각입니다.
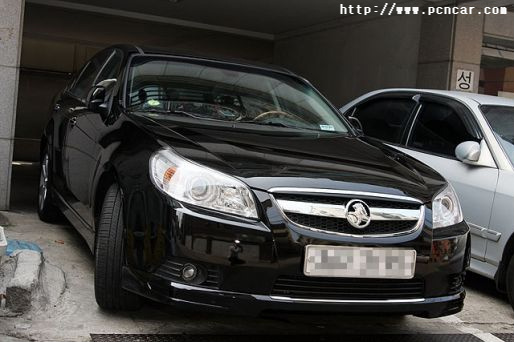
< 번호판 달자마자 집에서 찍은 토스카 프리미엄6 CDX 입니다, 타이어가 깨끗하죠 >
< 3M 썬팅 후 찍은 사진입니다. 17인치 알로이 휠은 순정입니다 >
토스카의 외관은 한 마디로 정의해 도발적입니다.
오버행이 짧은 편도 아닌데 상당히 비율을 잘 맞아떨어지는 편이며, 옆으로 크게 부릅뜬 헤드라이트는 어렸을 적 삼국지에서 봤던 관운장의 두 눈과 닮았으며, 상대적으로 긴 엔진룸 - 이 부분에 대해서는 L6 엔진의 특성이라고 봐야 할 것 같네요 공간을 많이 차지하기 때문에 4기통 엔진을 장착한 동급 모델에 비해 상당히 깁니다 -에 이은 ABC필러 라인을 따라 뒤쪽은 치켜 올라간 엉덩이 라인 까지 전체적으로 100M달리기 선수가 출발라인에 선 것처럼 앞은 낮고 뒤는 높은 역동적인 달리기용 디자인이라고 봐도 될 겁니다. 물론 토스카는 전형적인 달리기용 차량은 아닙니다. 겉보기가 그렇다는 거죠
저 역시 토스카의 그런 외관이 마음에 들었고, 파워트레인과 더불어 외관에 대한 선호도 때문에 시승도 없이 선뜻 토스카를 구입하게 된 것입니다.
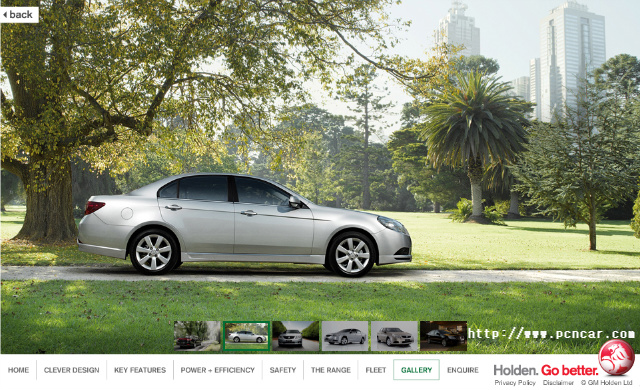
GM대우의 홈페이지에는 이런 월페이퍼용 사진이 제공되고 있지 않기 때문에 Holden 사의 홈페이지 이미지를 가지고 왔습니다. 예전 서태지옹의 광고가 진행될 때는 토스카 홈페이지에서도 월페이퍼가 제공되었는데, 어느 순간 없어졌더군요. GM대우 홍보 담당자들은 진짜 군대용어로 x잡고 반성해야 합니다.
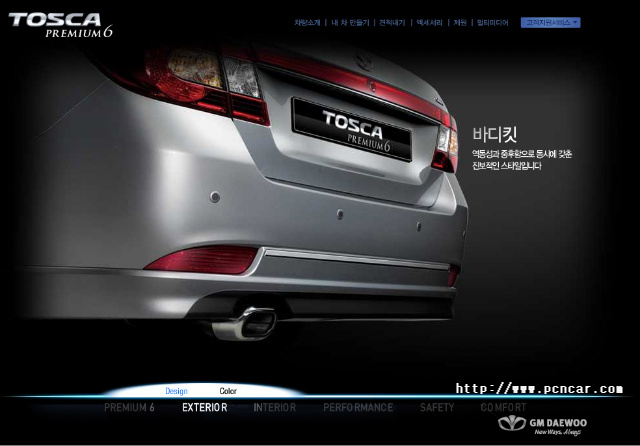
위의 사진에서 볼 수 있는 옆 라인은 본넷 라인에서부터 트렁크 라인까지 전체적으로 수평에서 약 5도 정도 치켜올라가서 마무리가 됩니다. 경쟁 회사의 주력 모델인 소나무 시리즈에서 볼 수 있는 전체적인 라인에서의 수평화와는 약간 다른 컨셉임에 분명합니다. 특히 이전 모델에서는 옵션으로 취급되었던 하단 에어로팩의 경우 프리미엄6에 들어와서는 기본 탑재가 되고 있기 때문에 치켜올라간 엉덩이에 비해서 전체적인 차고는 낮아보여서 안정감이 더욱 강조되고 있습니다.
차를 구입하고 얼마 지나지 않아 전 회사의 동료가 소나무를 구입해서 휠 교체, 서스 다운 작업을 해서 저에게 자랑을 한 적이 있었습니다. 서스 다운은 아시다시피 차량의 전고를 낮춤으로써 차의 자세를 잡아주는 역할을 합니다. 그러나 소나무 시리즈가 다운한 높이와 순정 서스펜션을 갖고 있는 제 차량의 높이가 차이가 전혀 나지 않아 그 동료가 머쓱해하며 마무리가 된 적이 있습니다. 그만큼 기본 장착인 에어로팩은 차량의 차고를 낮게 보여주는 장점을 갖고 있습니다. 당연히 토스카 역시도 서스 다운 작업이 가능하기 때문에 그런 경우에는 거의 레이싱용 튜닝카처럼 땅바닥에 붙어달릴 수 있을 만큼 다운 작업이 가능합니다. 물론 서스 다운 작업은 그만큼 요철에 취약하기 때문에 안전 요건을 채우지 않고 있는 몇몇 과속방지턱을 통과할 때는 각별한 주의가 필요하기도 합니다.
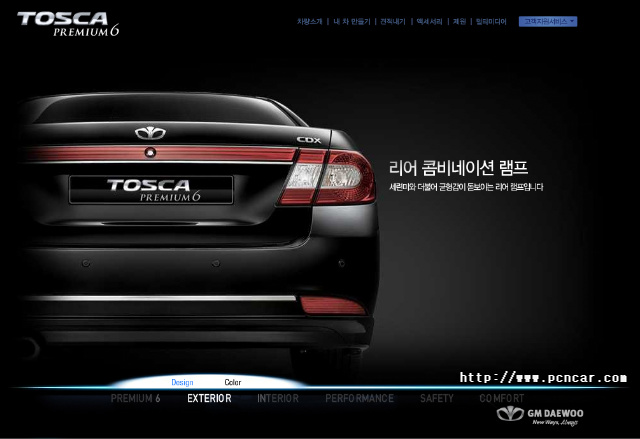
토스카 07년식 이전 모델과 토스카 프리이엄6의 가장 큰 외관적 차이라고 할 수 있는 뒷태 사진입니다. 크고 작은 동글뱅이 2개로 마무리했던 테일램프, 그래서 뒷태가 어색하고 못생겼다는 평가가 주를 이루었던, 를 리어 가니쉬와 일체화시켜 보다 다이나믹한 모습을 만들어냈습니다. 그리고 트렁크 리드의 높이도 기존 모델보다 조금 낮추어서 달리기 모양을 강조는 하되, 어색함은 없앤 수준에서 마무리지었습니다.
그러나 아쉬운 것은 리어 테일 램프에서 브레이크 등은 여전히 동글뱅이라는 겁니다. 저런 모양을 만들어놨으면 리플렉터로 마무리 지을 것이 아니라, 저 모양 그대로 LED처리를 하든지, 혹은 모양 그대로 전체적으로 전구가 들어오면 더욱 예쁘지 않았을까 하는 생각은 여전히 가지고 있습니다.
리플렉터의 모양대로 LED를 장착하여 출시한다면 09년 모델은 더욱 예뻐지지 않을까 라는 생각인데, 어떻게 나오게 될지 모르겠네요. 물론 애프터마켓용으로 출시된 코리아 스포일러 LED 테일램프를 장착하면 저 모양 그대로 LED를 장착할 수 있는데요. 순정으로 장착되어 나오느냐 애프터마켓용이냐의 차이는 생각보다 큰 편입니다. 순정형으로 출고된다면 아마도 그 정도 원가는 충분히 뽑을 만큼 더 많은 수량의 차가 판매되지 않을까 싶습니다.
위 사진은 설명 그대로 토스카용 테일램프 장착 사진입니다. 시인성이 좋고, 모양도 예쁘며, 클럽 토스카 같은 동호회에서 올려진 글을 보더라도 만족도가 가장 높은 아이템 중 하나입니다만 왜 GM대우에서는 순정형으로 장착하지 않는지 정말 의문입니다. 마케팅 팀은 보다 면밀한 분석, 그리고 제품에 대한 개선 의지를 가질 필요가 있을 것 같습니다. 옵션이었던 에어로팩을 프리미엄6에서 기본 장착한 것처럼 LED 테일램프 역시 기본 장착해야 할 필요가 있다는거는 분명한 사실입니다.
Epica 모델의 사진이어서 GM대우 특유의 돼지코 엠블럼과 다소 답답해보이는 크롬은 보이고 있질 않습니다. 물론 예전 대우차량이 모두 그런 모양을 가지고 있다 하더라도, 그것이 설사 대우의 아이덴티티라 하더라도 다소 바꿀 필요는 있어보입니다. 주변의 의견을 종합해보더라도 답답해보이고, 전체적인 디자인을 해치고 있다는 의견이 많거든요. 물론 그 디자인은 신차인 라세티 프리미어에도 동일하게 채용되어있기 때문에 GM대우에서는 별다른 개선 의지는 없다고 볼 수 있겠네요. 그렇지만 동일한 디자인의 차량인데 그릴 하나 바꿨다고 저렇게 시원해보인다는 건 GM대우로서도 어느 정도 생각을 해봐야 하지 않나 싶습니다.
토 스카를 가지고 계신 분이라면, 혹은 관심있어 하시는 분이라면 누구나 반할 듯한 대각선 사진입니다. 토스카 프리미엄6의 라인이 가장 예쁘게 보이는 각도이기도 하죠. 치켜올라간 눈, 범퍼 아래로 보이는 프론트 에어댐, 사이드 커튼, 그리고 거의 18인치급으로 커보이는 17인치의 순정휠까지 토스카의 매력적인 디자인이 한 눈에 보입니다.
제 차가 검정색이기 때문에 애착이 가는 사진입니다. 물론 저희 집 배경에서는 저런 분위기를 연출할 수는 없지만, 조금 외곽으로 나가서 사진을 찍어본다면 순정인 상태에서도 얼마든지 저런 분위기를 낼 수 있으며, 단지 쇼룸에서만 볼 수 있는 그런 이미지는 절대 아닌 것이 바로 토스카 프리미엄6의 디자인이 아닐까 싶습니다.
사이드 턴 시그널 램프라고 되어있죠. 고급스러운 기능이라고 되어있습니다. 물론, 그렇죠. 또한 사이드 미러에는 열선이 내장되어있어서 추운 겨울 혹은 김서림이 발생할 수 있는 조건의 기후에 열선을 통해 해결할 수 있습니다. 저 역시도 이번 설에 폭설 중에 열선을 켜놓음으로써 안전운행에 조금이라도 도움을 받은 것이 사실이고요.
외관은 아니고 안전사양에 들어갈 부분이긴 하지만 토스카 프리미엄6의 오른쪽 사이드 미러는 후진 기어시 자동으로 아래로 내려가서 후방 시야를 확보해주는 장점이 있습니다. 주차할 때, 특히나 일렬 주차할 때 인도턱이나 뒷차와의 거리를 잴 때 상당히 도움이 되지요. 이 부분에 대해서는 다음의 안정 사양을 말씀드릴 때 다시 언급하도록 하겠습니다.
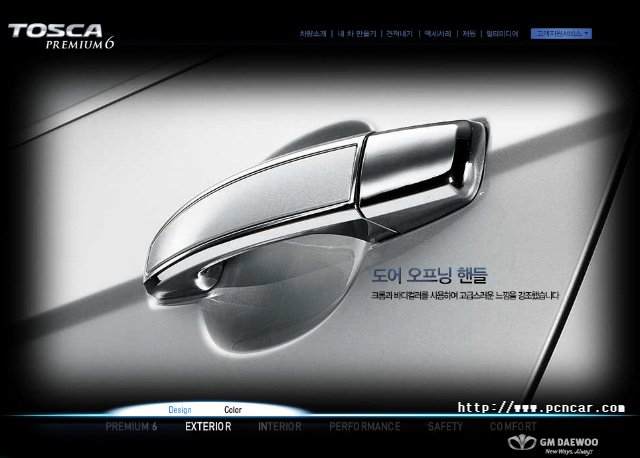
도어 핸들이 이전 모델에 비해서 조금 더 고급스러워지긴 했습니다. 밋밋했던 손잡이에 바디컬러와 크롬을 조합함으로써 만들어낸 효과이기 때문에 적은 비용으로 최대의 효과를 보게 된 것이라 더욱 좋은 것 같습니다. 감성 품질이라는 건 이렇듯, 아주 작은 배려만으로도 이뤄낼 수 있는 거라는 점을 자동차 메이커 회사에 근무하는 마케팅 담당자들은 알아야 할 필요가 있습니다. 소비자 만족도 높인다고 엄한데다가 돈질을 하라는 건 아니라는 거죠.
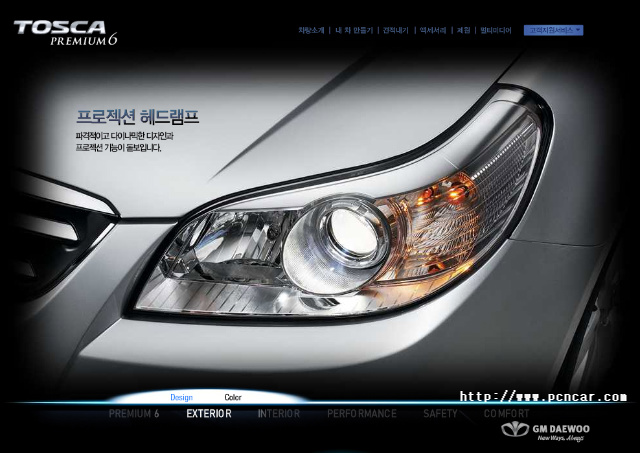
토 스카의 가장 큰 특징이라고 할 수 있는, 어쩌면 토스카 디자인의 아이덴티티라고 볼 수 있는 쭉 찢어진 헤드램프입니다. 다만 개인적으로는 사이드 깜빡이를 쭉 찢어진 그 끝에다가 위치시켰으면 어땠을까 하는 생각이 듭니다. 지금 사진 상으로도 깜박이 오른쪽 부분이 좀 허전하지 않습니까? 조금은 아쉽게 다가오는 부분입니다만, 그럼에도 이런 파격적인 헤드램프 디자인은 상당한 매력 포인트임에 분명합니다.
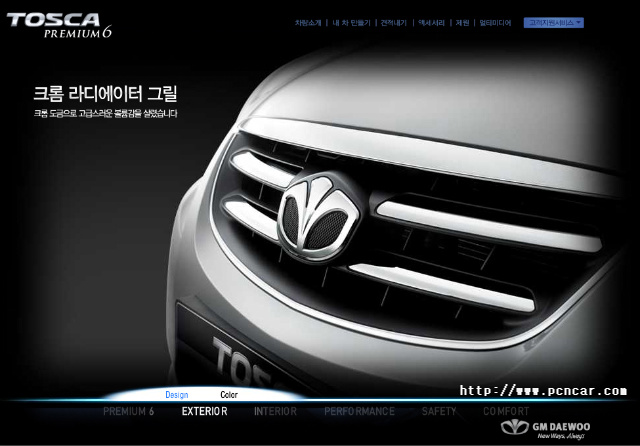
앞 서도 지적했던 대우의 전통적인 크롬 그릴입니다. 크롬 처리한 가로 두 줄에 대해서 뭐라고 하고 싶지는 않습니다만, 대우 로고 크기를 좀 줄이는게 어떤가 싶습니다. 대우 로고가 지나치게 크다 싶은게.... 대우가 프리미엄 브랜드가 아닌데 뭐할라고 저렇게 크게 처리했는지 디자인을 전혀 모르는 제가 봤을 때는 좀 이해가 안 됩니다. 좀 답답해 보이는 성향이랄까요. 상단의 크롬 가니쉬도 상당히 두꺼운 편이어서 좀 얇고, 날렵하게 처리했다면 더욱 보기 좋지 않았을까요. 같은 디자인의 Holden Epica의 그릴이 보기 좋은 건 단지 대우 마크가 안 예쁘고, 사자로고가 예뻐서만은 아닐 겁니다.
실제보다 커보이는 플렌지리스 타입이라고 되어있는 토스카 순정 휠입니다. 저 역시 17인치 순정휠을 끼고 있습니다만, 어지간한 18인치 사제휠 같은 느낌이 들 만큼 커보입니다. 물론 무게가 10kg을 훌쩍 넘는 무게가 있기 때문에 경량휠로 가려는 분들을 제외하고는 사제휠이 그다지 필요없이 느껴지는 디자인입니다.
다만 토스카 프리미엄6의 파워트레인이 치고 달리기용이 아니기 때문에 주행성이 높아진다거나 하지는 않습니다만, 조금 젊은 피를 가지고 있는 분들이라면 과감히 15인치 휠을 포기하고 17인치로 구입해보는 건 어떤가 라는 생각이 들만큼 스타일이 살아있습니다. 물론 17인치의 경우, 15인치 휠보다는 승차감이 떨어지고 연비가 안 좋아진다는 단점은 있으므로 그 부분에 대해서는 참고하는게 좋을 것 같네요.
앞에서도 언급했던 토스카07년식과 토스카 프리미엄6를 외관으로 봤을때 확실하게 구분할 수 있는 포인트인 리어 테일 램프입니다. 이전 모델보다는 예뻐졌지만, 브레이크 등 모양은 그대로이고, 나머지 빨간 색 부분은 리플렉터로 처리해버렸다는게 많이 아쉽습니다. 그 모양 그대로 LED 방식으로 만들었으면 좋겠네요.
순정 에어로팩은 토스카를 더욱 역동적인 디자인으로 만들어줍니다. 07년식 순정 에어로팩 가격이 상당히 비싸다는 걸 감안해보면 프리미엄6를 출시하면서 GM대우가 준 외관적 선물 중 가장 큰 부분이 아닐까 싶습니다.
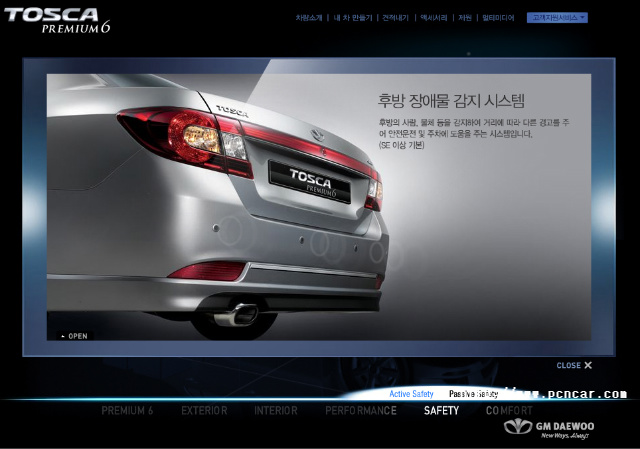
토 스카에 장착된 4구짜리 후방 감지 센서입니다. 동급의 다른 경쟁 차량에 장착된 것이 주로 3구라는 것을 감안하면 4구 시스템이 조금은 더 좋을 거라고 생각합니다. 그러나 09년식부터는 토스카 역시도 3구로 바뀐다고 하네요. 역시 08년식이 최고인건가요...흠~ 어쨌거나 4구 후방 감지 센서 덕분에 아직까지 주차하면서 뒤로 박아서 사고난 적은 없는 것 같네요. (물론 사제로 장착한 후방 감지 카메라 덕분이기도 합니다)
조금 길고도 장황하게 토스카의 익스테리어에 대해서 알아보았습니다. 이중에는 08년식에만 한정되는 내용도 담겨있습니다. 09년 식에는 몇몇 외장이 바뀐다고 되어있네요. 샤크 안테나 기본 장착, 4구 후방 감지 3구로 변경 등...... 09년식에서 변경되는 부분은 곧 내장 외장 가리지 않고 정리해보도록 하겠습니다.
지난 글의 토스카 프리미엄6의 외관에 이어 이번엔 인테리어를 한 번 살펴보겠습니다. 토스카 프리미엄6의 인테리어는 많은 분들이 등급에 맞지 않는 비주얼을 가지고 있다고 원성이 자자합니다. 물론 저 역시도 개인적으로 썩 마음에 들지는 않았었으니까요. 하지만 자동차라는게 비주얼이 좋다고 좋은 것은 아니라고 생각합니다. 인테리어에 있어 비주얼은 그저 부가적인 것일 뿐이지, 그게 주된 것은 아니라는 얘기죠. 제가 생각하는 자동차의 인테리어의 좋고 나쁨은 얼마나 운전자가 운전하기 편리하게끔 해주느냐 아니면 불편하게 하느냐, 운전에 도움을 주느냐 혹은 방해를 주느냐, 자동차에 있는 기능을 사용할 때 얼마나 운전을 방해받지 않도록 하느냐 하는 것입니다.
흔히 국내 유저들은 자동차에 블루투스가 있어야 하고, 아이팟을 꽂을 수 있어야 하며, 센터페시아는 번쩍번쩍 해야 하며, 계기판도 화려해야 좋다고 합니다. 하지만 그러한 것들은 말 그대로 있어도 좋은 거지만 없다고 불만이 될 수는 없는 단어 그대로의 Additional 이라는 것입니다. 자동차 인테리어의 핵심은 탑승자가 자기가 해야 하는 일에 얼마나 집중할 수 있느냐로 좋고 나쁘고를 판단해야 한다는 것, 절대 간과하지 마시길 바랍니다.
그런 의미에서 토스카의 인테리어에 대해서 말씀드려 보겠습니다. 물론 익스테리어 만큼이나 인테리어 역시 개인적 취향이 절대적인 영역인 만큼 서로 다를 수 있다는 것은 알아주셨으면 좋겠습니다. 다르다고 틀린 건 아니니까요
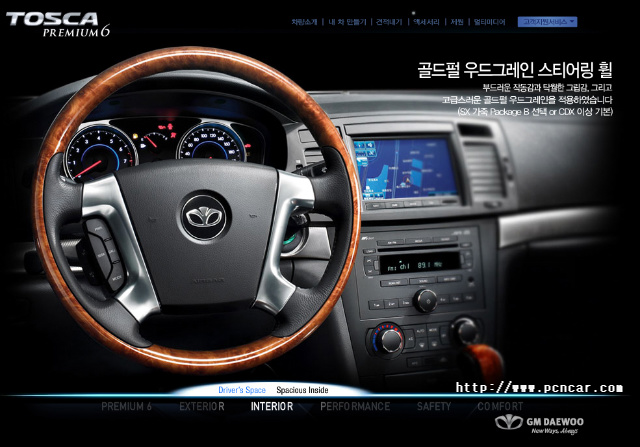
운전석에 앉으면 바로 보이는 영역입니다. 스티어링 휠과 계기판. 제 차 역시 CDX이기 때문에 이 나무 재질의 스티어링 휠이 장착되어있습니다. CDX는 가죽 패키지가 기본이거든요. 토스카 우드 스티어링휠은 손에 딱 잡히는 느낌입니다. 물론 여름에 손에 땀이 나거나 하면 끈적거리는 건 어쩔 수 없는 부분이지요. 그러나 같은 조건에서 가죽 혹은 일반 모직 재질로 된 스티어링 휠의 경우는 땀으로 인한 곰팡이 증식이라든가 특유의 냄새 때문에 운전 후 손에 그 향이 밸 수도 있다는 점 등은 우드 재질이 가지고 있는 장점이라고 볼 수 있겠습니다. 그러나 겨울이 되니 또 얘기가 달라지더군요. 히터가 동작해서 어느 정도 공기가 따뜻해질 때까지 스티어링 휠이 너무 차가워서 손이 다 얼어버릴 지경이라는 건 나무가 가지고 있는 단점인 것 같습니다.
그렇다고 하더라도 스티어링 휠에 별다른 장식을 더하고 싶지는 않습니다. 혹시라도 모를 안전을 위해 파워 핸들이라 부르곤 하는 걸 달고 싶지도 않습니다. 사고 시에 얼굴 혹은 흉부를 타격하게끔 하는 그런 장치는 경미한 부상으로 끝날 수 있는 사고를 자칫 치명적 중상으로 둔갑시킬 수도 있으니까요.
스티어링 휠 좌측에 자리하고 있는 오디오 컨트롤러는 오디오의 대부분 기능을 이용할 수 있습니다. 그 말은 운전하는 도중에 굳이 센터페시아까지 손을 뻗지 않고 운전에 집중할 수 있다는 얘기기도 합니다. 센터페시아까지 손을 뻗치는건 단순히 손만 가는게 아닙니다. 단추의 위치를 파악하고, 단추를 누르기 위해서는 한 손과 함께 눈도 가게 되어있습니다. 결국 오디오 기능을 변경하는 그 동안의 몇 초는 단지 하나의 손에 의해서만 의지를 할 밖에 없기 때문에 주행 안전에 좋지 않은 영향을 줄 수 있습니다.
따라서 오디오 컨트롤러의 채용은 좋은 점이긴 합니다만, 이 콘트롤러의 치명적 단점이 하나 있습니다. 그건 다름 아닌 "이전 곡" 선택이 안 된다는 것입니다. 노래를 한 번 더 듣기 위해서는 센터페시아까지 손이 가서 이전 곡 버튼을 누르든지 아니면 반복 기능 버튼을 누르는 수 밖에 없습니다. 이건 좀 수정을 할 필요가 있어 보입니다. 차라리 CALL 버튼을 빼고 이전 곡 버튼을 넣어주는 게 어땠을까 싶습니다. 어차피 CALL 버튼은 핸즈프리용이지만, 안전을 위해서도 벌금을 내지 않기 위해서도 운전 중 전화 통화는 하지 않는게 좋으니까요.
"왜 이래 아마추어같이~" 제가 오디오 컨트롤러를 사용하면서 이 버튼을 장착하기로 한 GM대우 관계자에게 느낀 점입니다
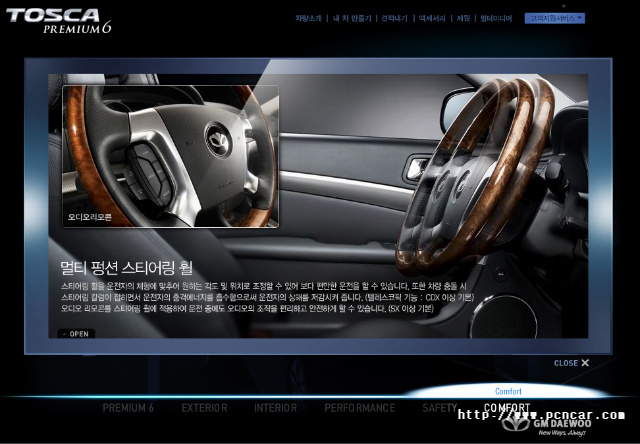
멀티 펑션 스티어링 휠 이라는 항목이 Comport 항목에 있었습니다만, 어차피 중복 되는 내용이 될 것 같아서 땡겨왔습니다. 토스카 프리미엄6의 스티어링 휠은 운전자의 체형에 맞도록 원하는 각도와 위치를 조정할 수 있습니다. 하지만 그것이 전자식이 아니기 때문에 100% 원하는 각도로 조정이 되지는 않는다는 것이 단점이라면 단점입니다만 이동하는 각도와 앞뒤로 움직이는 거리가 꽤나 길기 때문에 다양한 사용자의 취향을 맞추는데는 도움이 됩니다.
토스카 프리미엄6의 스티어링 휠은 안전 옵션이 추가되어있습니다. 에어백은 기본이고, 차량 충돌시 스티어링 휠이 아래로 접히면서 운전자와의 2차 충돌을 막아줍니다. 물론 그런 일이 생기면 안 되겠지만, 사고는 자동차에 앉으면서는 언제든 일어날 수 있다는 전제를 해야 할 테니까요.
오디오 버튼은 위에 설명했으니 따로 부연하지는 않겠습니다만, SEEK 버튼-CD를 재생할 때는 다음곡 버튼으로 동작하는-을 반으로 쪼개서 다음곡과 이전곡으로 나누어 주었으면 좋겠습니다.
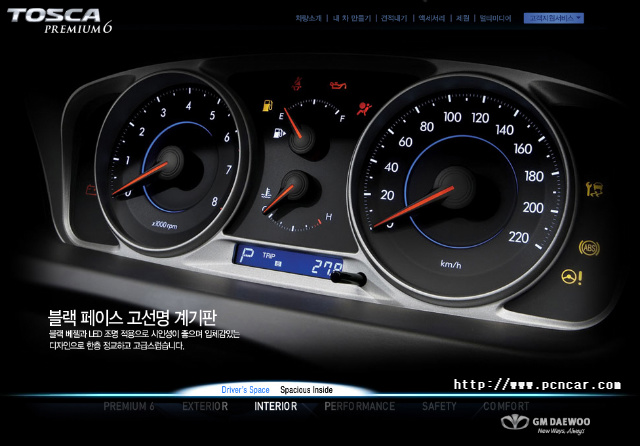
토스카 프리미엄6에서 이전 07년식 토스카와 가장 크게 바뀐 점을 인테리어에서 꼽으라면 바로 이 계기판입니다. 이전 토스카 유저들의 가장 큰 불만 중 하나가 계기판이 싼티난다는 것이었습니다. 그래서 계기판만 따로 교체하는 유저들도 적지 않았습니다. 교체까지는 아니더라도 별도의 드레스업 아이템이 존재하고 있을 만큼 07년식까지의 토스카 계기판은 이래저래 좋은 평가를 받지는 못했습니다.
그러나 프리미엄6의 계기판은 상당히 시인성도 좋고, 예쁜 편입니다. 물론 더욱 예뻐 보이는 라세티 프리미어 보다는 못합니다만 지나치게 스포티하지 않으면서도 중형으로서의 체면치레는 하고 있다고 생각되는 만큼 아쉬움 보다는 "07년식이 그대로가 아닌게 어디야" 라는 만족감이 큰 편입니다.
참고로 토스카 프리미엄6의 RPM 게이지는 8000까지 있습니다만 실제로 제가 사용해본 것은 3500이 맥시멈이었습니다. 그 이상으로 올릴 일이 없더군요.^^
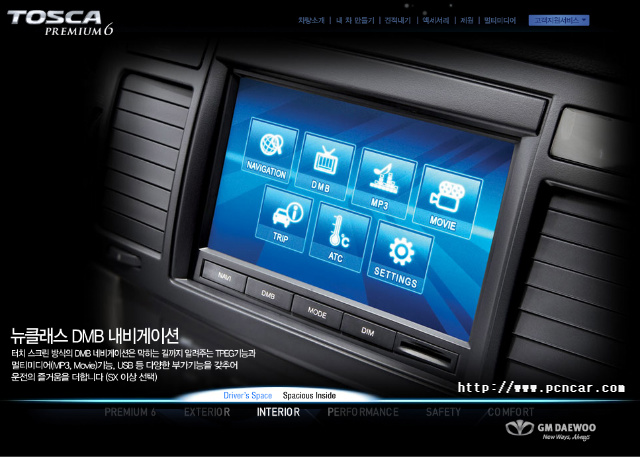
말도많고 탈도 많은 뉴클래스 DMB 네비게이션입니다. 07년식까지는 오디오 팩에 포함되어있어 상당히 비싼 옵션이었습니다만, 프리미엄6로 넘어오면서 오디오팩과 분리되면서 80만원대에 순정 네비게이션 매립이 가능해진 아이템입니다. 네비게이션의 매립으로 좋은 점은 자동차의 상태를 알려주는 공조기가 작은 화면이 아닌 7인치 화면에 보이기 때문에 고급스럽다는 점이며, 유리창이나 대쉬보드에 올려지는 것이 아니기 때문에 시야를 가리지 않는다는 점이 있습니다.
자동차 앞유리에 7인치 네비게이션, 대쉬보드에는 하이패스와 각종 미니앨범, 장식용 인형을 놓는 것도 안전에 있어서는 별로 좋은 습관은 아닙니다. 시야를 조금이라도 가리는 건 그만큼 사각이 많아지는다는 것을 의미하는 것인데요 그 중에서도 가장 좋지 않은게 저는 룸미러(흔히 빽미러 라고 부르는)에 인형, 묵주, 목탁, 십자가 등등을 걸어놓는 것이라고 생각합니다. 시야를 가릴 뿐 아니라 주행 중 흔들리면서 시선을 분산시킬 우려가 있기 때문에 가급적 차에는 아무것도 두지 않는게 좋습니다. 정 놓고 싶으시다면 대쉬보드에 짝 달라붙도록 하시는게 나을 겁니다. 물론 그마저도 햇빛에 반사되어 눈부시게 하는 거라면 없는게 나을 거고요.
뭐 얘기가 좀 길어졌습니다만, 어쨌든 네비게이션을 매립하게 되면 운전중 시야확보가 용이해지기 때문에 좋습니다. 차가 고급스러워보인다는 건 부수적인 소득인거고요. 그게 메인은 아닙니다.
그러나 기본 네비게이션은 얼마 전 업데이트되기 전까지 맵 데이터의 부실과 경로 검색의 비정확성, 주행 중 DMB 사용 불가 등으로 말이 많았었습니다. 저도 그런 사전 정보를 입수하고 있었기 때문에 뉴클래스 네비게이션은 빼고 일반 7인치 네비게이션을 그 자리에 매립해서 사용중입니다. 맵 업데이트는 엊그제 이루어졌기 때문에 어떻게 평가가 될지는 조금 더 지켜봐야 할 것 같습니다만, 주행 중 DMB 불가능 저는 안전 상의 이유로 그게 꼭 나쁘다고만 생각하진 않습니다. 물론 저도 가끔은 운전 중에 DMB를 켜놓기는 합니다만 그건 저를 위함이 아니고 동승자를 위한 것이죠. 하지만 저 역시 사람인지라 뭔가 재밌는게 나오면 슬금슬금 시야가 화면에 꽂히는 건 어쩔 수 없는 부분입니다. 그래서 저도 가급적 운전 중에는 DMB를 켜지 않습니다.
저는 처음부터 외부 네비를 사용하고자 했기에 옵션에서 선택하지 않았었습니다만, 혹시라도 저렴한 가격에 순정 네비가 필요하신 분이라면 장착해봄직한 아이템입니다.
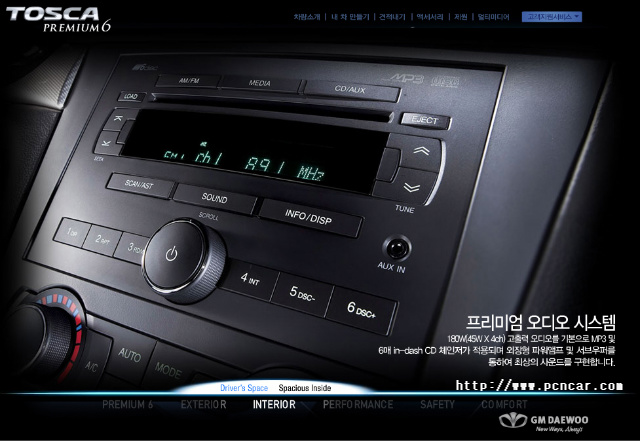
프리미엄 오디오 시스템이라고 소개하고 있는 토스카의 오디오 시스템은 MP3가 지원되는 6CD 체인저입니다. 총 출력은 채널당 45W씩 180W입니다. 나름 까막귀는 아니라고 생각하고 있는 제가 듣기에 토스카의 이 '프리미엄 오디오 시스템'의 점수를 매기자면 100점 만점에 75점 정도 됩니다. C+정도 되는 건가요?
기본적인 음질은 상당히 좋은 편입니다. 음색은 부드럽고, 밸런스는 잘 잡혀있고, 저음은 때려준다기보다는 밀어준다는 느낌입니다. 일부 유저분들은 우퍼가 별로라고 하시는데요. 무조건 쿵쿵 때려주는 우퍼가 좋은 거는 아닙니다. 오히려 지나치게 때려주는 우퍼의 경우는 원음을 왜곡하여 듣기 거북하게 들리기도 하거든요. 토스카의 우퍼는 때려주는 우퍼는 아니기 때문에 그 부분에 대해서는 미리 알고 계시는게 좋을 것 같네요.
다만 아쉬운 점은 180W라는 출력은 좀 아닌 거 같습니다. 앰프의 출력이든 스피커의 출력이든 둘 중 하나는 미스 매치입니다. 실제 스펙 대비 출력량은 180W라고 하기는 어려운 이유는 CD를 기준으로 해서 볼룸을 20(전체는 40이 넘습니다)까지가 실제로 들을 수 있는 최대값이라고 볼 수 있습니다. 그 이상으로 높이게 되면 스피커에서 견디기 괴로운 소리를 출력해주게 되고, 그 사운드의 양은 차량을 꽉 채우기는 하지만 차량에 차고 넘치는 수준까지는 되지 못하기 때문입니다.
실제 HiFi용 앰프와 스피커까지 아니더라도, 정격 출력을 제대로 보장해주는 PC용 스피커라 하더라도 정격출력 30~50W면 집 전체가 떠나가라 볼룸을 확보할 수 있다는 것을 경험적으로 알고 있는 바로서는 정격출력 180W라 하기엔 토스카 프리미엄6의 오디오는 출력 부분에서 많이 부족해 보입니다. 특히 Aux 입력에서는 더욱 그 출력이 감소하게 되므로 참고하실 필요가 있을 것 같네요.
그럼에도 불구하고 토스카에 장착된 기본 오디오는 순정 치고는 상당히 만족스런 사운드를 들려주므로 굳이 오디오 튜닝까지는 안 하셔도 될 것 같습니다. 평소에는 고속도로에서도 5~6 정도로 놓고 다니면서도 옆 사람과의 대화가 조용조용 대화가 가능한 것이 바로 토스카 프리미엄6 이니까 말입니다.
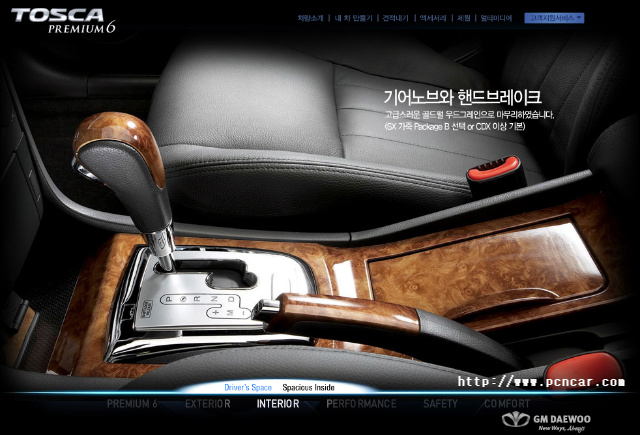
이전 토스카와 구별되는 또 하나의 차이점이 바로 기어노브와 그 주변부입니다. 이 부분은 이전 모델의 어두운 우드 색상이 더 좋다는 분과 밝아져서 더 좋아졌다라는 분들의 의견이 갈리는 항목입니다. 하지만 저의 개인적 생각으로는 이전 모델의 색상보다는 지금의 것이 좋다고 봅니다.
이 부분에 대해서는 사실 시야가 간다기보다는 손이 많이 가는 곳이기 때문에 디자인적으로 이야기할 수 있을 만한 부분은 별로 없습니다. 주차 브레이크 노브나 기어 노브의 경우는 운전 자세를 고치지 않고서도 조정을 할 수 있는 매우 적절한 위치에 있으므로 운전 편의성을 증대시켜준다는 장점은 분명히 있는 것 같습니다.
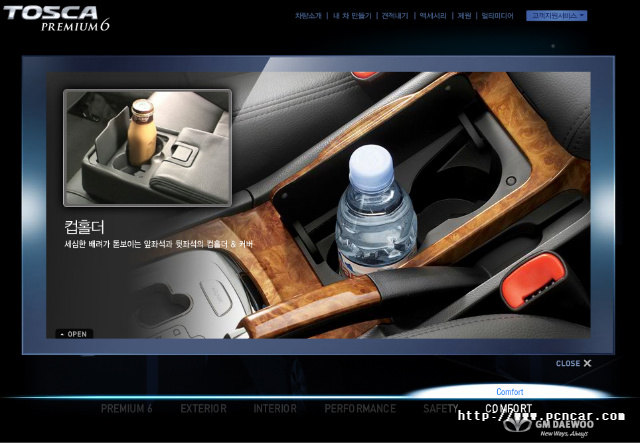
컵 홀더입니다. 커피를 좋아하는 저로서는 가장 많이 사용하는 부분이기도 합니다. 2칸으로 되어있는데 앞 칸은 좀 더 깊었으면 어땠을까 하는 생각입니다. 생수통을 저렇게 꽂아놓은 적이 있었는데, 오른쪽 팔을 센터 콘솔에 걸치고 있으면 생수통이 팔에 닿더군요. 그래서 조금은 깊었으면 좋았을 걸 하는 생각은 하지만 그렇게 크게 불편한 부분은 아닌 만큼 뭐 지금 상태에서도 충분히 예쁩니다
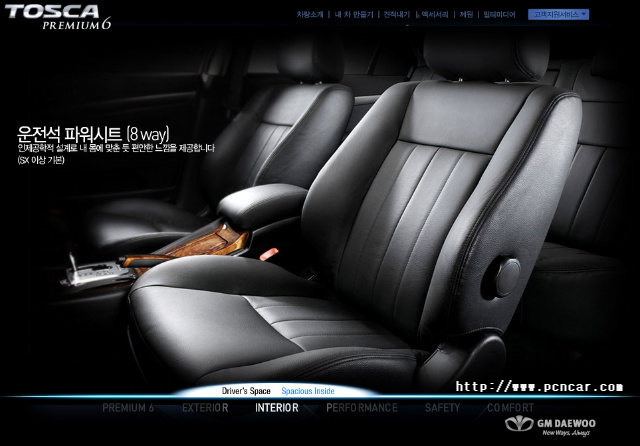
토스카 프리미엄6의 운전석은 8 Way 방식의 전자식 조절이 가능합니다. 좌석의 앞/뒤 이동, 등받이의 앞/뒤 이동, 좌석 앞단의 위/아래 이동, 좌석 뒷단의 위/아래 이동 등 총 8개의 위치 이동이 가능한 만큼 보다 자연스럽고 편안한 자세로 운전을 가능하게 합니다. 전자식이긴 하지만 메모리 저장 기능은 제공하고 있지 않습니다. 이 부분은 다른 동급의 차량도 마찬가지이므로 단점이라 할 수는 없고, 오히려 8 Way 방식을 통한 다양한 유저들의 자세에 적합한 위치를 찾아줄 수 있으므로 매우 바람직하다 할 것입니다.
토스카 프리미엄6의 가죽 시트는 그다지 좋다는 느낌을 주지는 않습니다. 그렇다고 완전 허접스럽지도 않지만, 보다 고급 느낌을 주었으면 어땠을까 하는 아쉬움이 드는 정도라고 말씀드릴 수 있겠습니다.
또 하나 아쉬운 부분은 토스카의 운전성 등받이는 요즘 추세인 버킷 시트 혹은 세미 버킷 같은 느낌은 주질 않습니다. 허리를 완전히 감싸주지 못한다는 이야기이기도 하지요. 이 부분은 경쟁사 대비 탄탄한 하체를 가지고 있는 토스카로서는 조금 아쉬운 부분입니다. 만약 허리를 조금 더 감싸주는 등받이였다면 보다 공격적인 주행이 가능할 텐데 말입니다. 물론 일반적인 부분에서는 전혀 불만을 느끼지 못하거나 혹은 개인에 따라 약간의 불만을 느낄 수준 정도는 됩니다.
올해 설은 폭설로 인해 근 십 몇 년 만에 최악의 귀성길이었는데요, 13시간 동안 운전을 했음에도 그다지 허리가 아프다거나 하지는 않더군요. 그러니 단순한 불만을 제기할 수준의 시트는 아니라는 얘기가 될 것 같습니다.
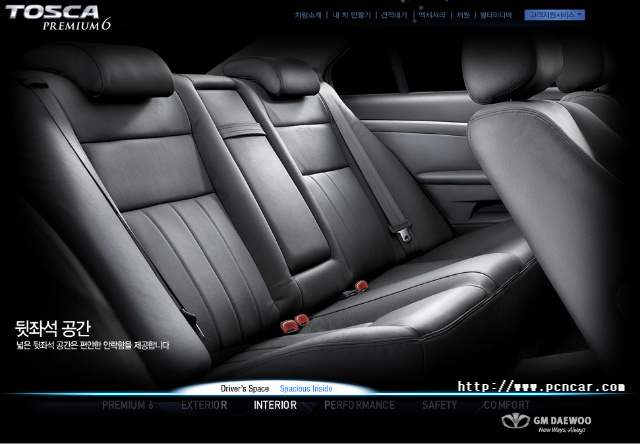
토 스카의 뒷좌석은 동급 차량 대비 가장 넓다고 할 수는 없을 겁니다. 평균치 정도 되겠죠. 동급 차량에서 가장 넓은 레그룸을 가지고 있는 차량은 현대의 소나무, 가장 좁은 차량은 르노의 슴5이며, 그 중간에 토스카가 위치하고 있다고 보시면 됩니다. 뒷 좌석은 조금만 넓었으면 좋겠다는 아쉬움이 남긴 합니다만, 그런 욕심을 부리려면 더 상위급으로 가는게 맞겠다는 생각을 해봅니다.
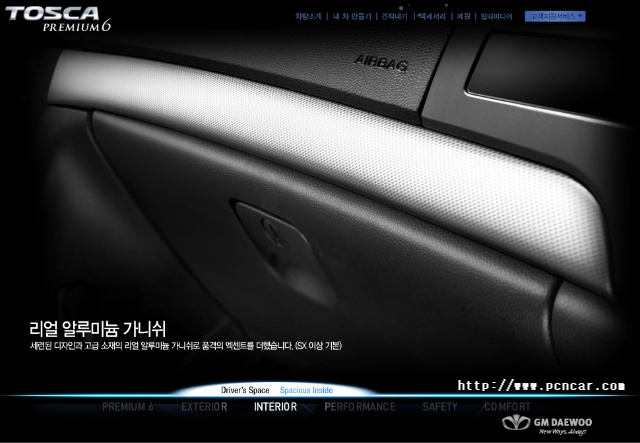
알루미늄 재질의 가니쉬는 밋밋하기만 한 토스카의 인테리어에 일종의 포인트를 주는 역할을 합니다. 토스카 프리미엄6의 대쉬보드 중에서 거의 유일한 디자인적 요소라고 할까요. 사실 디자인적 요소를 제외하고는 어떠한 기능적인 요소를 부여하진 않은 만큼 짧게 언급하겠습니다.
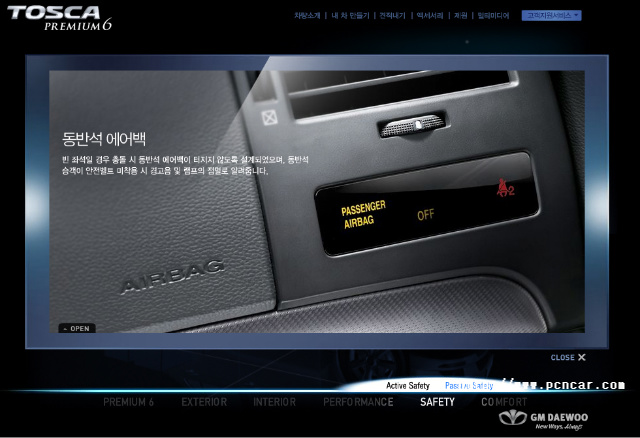
안전 옵션에 들어가있긴 하지만, 조수석 앞쪽 대쉬보드에는 작은 안내창이 하나 있습니다. 조수석에 사람이 앉으면 안전벨트를 메라는 내용, 그리고 안전벨트를 매지 않은 채 시속 20km 이상을 달리게 되면 상당히 시끄러운 경고음이 줄창 나오게 되어 안전벨트를 강요합니다. 안전 옵션으로는 상당히 좋은 것 같습니다. 저 개인적으로는, 안전 벨트를 메지 않으면 아예 차가 출발도 안되게 했으면 좋겠습니다.
토 스카 프리미엄6에서 선택할 수 있는 순정 전동식 선루프입니다. 단순한 열림/닫힘 뿐 아니라 뒷부분 틸팅도 원터치로 이루어집니다. 다만 열릴 때는 자동인데, 닫을 때는 계속 누르고 있어야 하는 부분은 좀 단점인 것 같습니다만, 안전상의 이유라고 하더군요. 안전 때문이라면 단점도 장점으로 보는게 나을 수도 있겠네요.
진정한 단점은 열릴 때는 유리창 뿐 아니라 안 쪽의 덮개도 같이 열리는데 반해, 닫을 때는 유리만 닫히기 때문에 서랍장 닫듯이 뚜껑 닫아주셔야 한다는 것입니다. 이거 은근 불편하더군요.
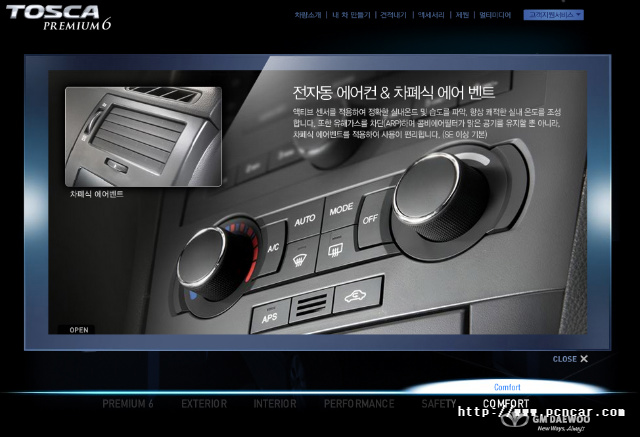
대우의 자랑, 에어컨입니다. 이번 여름이 굉장히 더웠는데도 불구하고 빵빵한 성능을 자랑해주던 전자동 에어컨입니다. 한 여름에도 정말 후덜덜입니다. 대우차량 답게 그 어떤 동급 차량의 에어컨보다 시원한 토스카 프리미엄6의 에어컨입니다.
유해 가스를 차단하는 APS도 장착되어있어 외부의 안 좋은 공기를 자동으로 차단해주기도 합니다. 다만 시골에서 풍겨오는 구수한 시골의 향기, 쇠똥 냄새는 차단 못하더군요.-_-;
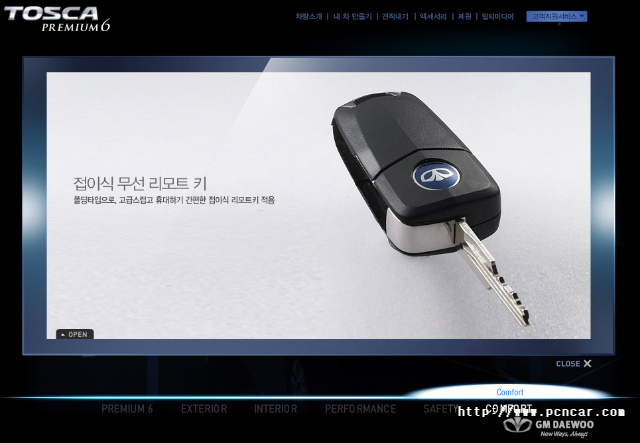
스 타트 버튼, 혹은 스마트 키가 대세인 요즘, 무슨 접이식 폴딩키로 유세냐 하실 수도 있겠습니다만, 이전 토스카의 열쇠를 보셨다면 이런 말씀은 안 하실 듯 하네요. 거의 마티즈급 열쇠였습죠. 그에 비하면 이건 정말 일취월장! 이모빌라이저가 내장되어있기 때문에 차량 분실 위험도 많이 낮추었습니다.
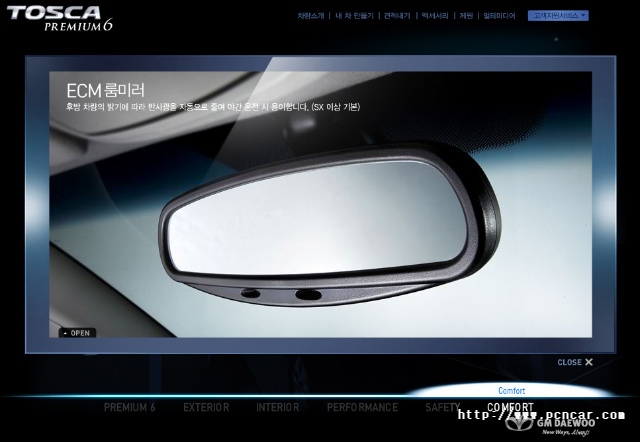
안 전을 위한 ECM 룸미러입니다. 룸미러는 그렇게 크지 않지만 자리에 앉았을 때 뒷유리를 통해 시야를 확보하기에는 딱 좋은 크기입니다. 과하지도 부족하지도 않기 때문에 굳이 순정 룸미러를 사제로 교체할 필요는 없을 것 같네요. 특히 야간에 눈부심을 방지해주는 ECM 룸미러이기 때문에 더욱 그렇습니다.
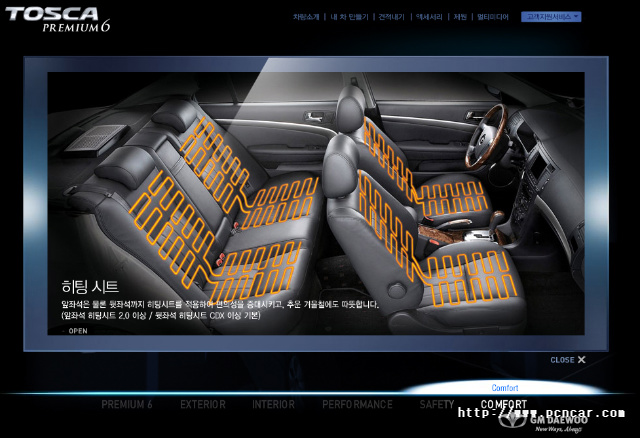
토스카의 자랑 또 하나 나왔네요. 물론 가죽시트를 해야 열선이 깔리는 건 어느 차량이나 마찬가지겠지만, 토스카의 경우 뒷좌석까지 열선이 들어온다는게 차이점입 니다. 작년 연말, 개인적인 방황으로 전국일주를 홀로 떠난 적이 있는데 그 때 토스카에서 하룻밤을 잔 적이 있는데요. 그 때 히터를 틀지 않고 오직 열선으로만 잠을 잘 수 있었습니다. 굉장히 따뜻하더군요. 물론 밤새 틀어놓은 뒷좌석의 히팅 시트 덕분에 밧데리 방전되서 고속도로 휴게소까지 긴급출동 불렀습니다.-_-
하지만 그런 경험에도 불구하고 굉장히 따뜻하고 한겨울에 히터가 들어오기 전까지 열선만으로도 몸을 녹이는게 가능하게 되어 겨울에도 움츠러들지 않아도 됩니다. 요즘도 계속 열선은 애용하고 있습니다.
음이온 공기청정기와 분리형 헤드레스트는 그냥 참고만 하시면 되겠네요. 공기청정기 필터를 지금까지 2번 갈았고, 3만 킬로를 넘으면서 한 번 더 갈아야 하는데, 음이온이 나오고 어쩌고 저쩌고 까지는 아니더라도 적어도 공기중의 미세먼지는 잘 걸러주는 것 같더군요. 필터가 아주 쌔카맣습니다. 제 경험 상으로 아이가 있는 집이라면 차량의 공기청정기가 기본 내장되어있는 차량을 선택하시는게 좋을 거라는 말씀드리고 싶습니다.
뒷좌석 헤드레스트는 아무래도 상대적으로 불편할 수 밖에 없는 중형급 세단의 뒷좌석에 앉은 분들을 위한 최소한의 배려라고 봅니다. 다리도 좁은데 뒷머리 기댈곳도 마땅치 않으면 참 곤란하겠죠.
이 밖에도 사진찍는 귀차니즘 때문에 소개를 안 한 내용을 간략히 정리해보자면,
1. 카드삽입이 가능한 동전 수납함 - 스티어링 휠 왼쪽 아래에 있어서 상당히 요긴합니다
2. 간단한 가방을 걸어둘 수 있는 옷걸이 - 조수석 방향 센터페시아 옆쪽에 있습니다. 잘 쓰진 않게 되더군요.
3. 2중 센터 콘솔 - 상당히 깊습니다. 온갖 잡다구리한거 다 집어넣을 수 있지요.
4. 다시방이라고 부르는 수납합 - 차 크기에 비해 넓진 않습니다만 그렇다고 좁지도 않아서 기본적인 것들은 들어갑니다.
여기까지 토스카 프리미엄6의 인테리어를 살펴보았습니다. 토스카 프리미엄6의 내장의 소박함을 보고 실망한 분들이 많다고 하시는데요, 내장이 화려하다고, 금장하고 보석 박는다고 훌륭한 인테리어가 아닙니다. 얼마나 차량 운전에 최적회되어있는가를 본다면 그렇게 나쁜 점수를 줄 수만은 없지 않나 싶은게 제 1년 가까운 시간 동안 토스카 프리미엄6를 운전하며 느낀 인테리어에 대한 평가입니다. 물론 다른 생각을 가지신 분들이 틀렸다는 건 아닙니다. 저의 기준에서 그렇다는 얘기죠
Quartz.NET is a full-featured, open source job scheduling system that can be used from smallest apps to large scale enterprise systems.
Quartz.NET is a port of very propular open source Java job scheduling framework, Quartz . This project owes very much to original Java project, it's father James House and the project contributors.
Quartz.NET is a pure .NET library written in C# which currently targets Framework version 1.1 and above. Quartz.NET is feature-wise equal to Quartz Java 1.6 excluding Java specifics. Quartz.NET is already running in production systems and has received good feedback.
With Quartz.NET you have more features available and you can have more programmatic control over scheduling compared to for example Windows Task Scheduler:
.NET API - you can control scheduler (remote / local) with .NET code and interact with it without any unmanaged code interop
Fine grained scheduling - CronTrigger should be a bit more feature-rich than standard windows scheduler and then you can have calendars added to the mix (rule based exclusions)
Programmatic control - you can put in glue code to handle misfire situations (windows scheduler has trouble with fine-grained failure scenario handling), listeners, custom triggers
Clustering - Quartz.NET can be ran on several computers to create load-balancing and fail over, job persistence with database
Support for creating WiX setup packages is now available in SharpDevelop 2.1. It was originally disabled in SharpDevelop 2.0, but has now been re-enabled and some new features have been added. It is still a work in progress. Some parts are not quite finished and there are some missing features, but it is currently being used to build and maintain the installer for SharpDevelop itself. At the moment SharpDevelop ships with WiX 2.0.4221, but it will be updated to 2.0.4415.0 shortly.
Features
WiX project and file templates.
Build a setup package (.msi), merge module (.msm) or WiX Library (.wixlib) from inside SharpDevelop. All built using MSBuild and WiX's custom MSBuild tasks.
Add WiX libraries, WiX extensions and preprocessor variables to the WiX project.
WiX Dialog Designer.
Setup Dialogs window. Lists all dialogs in a project. Each dialog can then be opened up in the designer.
Setup Files editor. Add directories, components and files to the installer via a GUI instead of editing the XML.
The next sections will look at the WiX support in more detail.
Creating a WiX Project
To create a new WiX project, from the File menu, select New and then select Solution.... In the New Project dialog select the Setup category.
SharpDevelop has two WiX project templates available
Empty Setup.
This project template creates a Solution (.sln), a WiX Project (.wixproj) and a minimal WiX Setup file (.wxs).
Setup.
The Setup project template creates a basic WiX project which can be built immediately after creation.
The installer created by this project installs a License.rtf file to the installation directory.
The Setup project template also has its own dialogs which can be customised.
The Setup project is the project we will be using in this walkthrough.
Building
Building the WiX project is done in the same way as for other projects in SharpDevelop from the build menu.
Output messages from the WiX compiler and linker are displayed in the Output window and any errors are added to the Errors window.
Creating a Merge Module or WiX Library
By default the project will build an MSI file. You can choose to create a merge module (.msm) or WiX Library (.wixlib) from the project options. Select the project in the Project Browser, then from the Project menu select Project Options.
From the Application tab you can change the output type to msi, msm or wixlib.
Running
To run the installer, select Run from the Debug menu or press F5. The installer will then be built and run and you will see the first dialog of your installer.
Adding a new WiX File
You can either have one big WiX setup file (.wxs) or split the project up into several different files. The WiX MSBuild tasks will compile all the WiX files and link them all into one installer.
To add a new WiX file, select the project in the Project Browser window, right click, select Add and then select New Item.... From the New File dialog selecting the Setup category will show you the WiX file templates.
Adding WiX Libraries
To add a wixlib to your project, select WiX Libraries in the Project Browser, right click and select Add WiX Library.
This opens up the file dialog where you can browse to one or more wixlibs and add them to the project.
Adding WiX Extensions
WiX extensions can be added to the project in the Compiling, Library and Linking tabs available from the project options. The Compiling tab determines what extensions are passed to Candle the WiX compiler. The Linking tab determines what extensions get passed to Light the WiX linker. The Library tab determines what extensions get passed to Lit the Wix Library Tool. If you are creating a setup package (.msi) then typically you should put the extensions in the Compiling and Linking tab. If you are creating a WiX Library (.wixlib) then you need to put the extensions in the Library tab.
The extensions can either be typed in directly into the Extensions text box, one per line, as shown above, or you can click the Add button to open the Add Extensions dialog and select one or more of the standard extensions WiX provides.
Preprocessor Variables
Preprocessor variables can be added in the Preprocessing tab available from the project options.
In the screenshot above the DATADIR variable is defined. Generally the variable values will just be strings, but you can also use MSBuild properties. In the screenshot above the SharpDevelopBinPath MSBuild property is being used. You can use MSBuild properties here since these properties will be expanded before WiX compiles anything.
In the UserInterface.wxs file the DATADIR preprocessor variable is referenced as shown below:
To open a setup dialog in the designer, open the WiX file, move the cursor so it is inside the dialog element, then click the Design tab.
You can also open a dialog in the designer from the Setup Dialogs Window, which is described in the next section.
You can have multiple dialogs defined in one WiX file or create one file per dialog, it is up to you. If you have multiple dialogs then you need to move the cursor inside the dialog element before you select the Design tab otherwise the designer will not know which dialog to load. If you have only one dialog element in the file then the cursor can be anywhere in the WiX document and does not need to be inside the dialog element.
In the designer you can reposition, resize and remove existing controls. You can also add new WiX controls from the Setup Dialog Controls tab by dragging them to the dialog.
At the moment not all the WiX controls are supported and WiX specific properties are not available in the properties window.
Setup Dialogs Window
To open the Setup Dialogs window, from the View menu select Setup and then select Dialogs.
The Setup Dialogs window is then opened.
This window lists all the dialogs available in the project. You can open a dialog into the designer by right clicking it and selecting Open. Or view its XML by selecting View Code.
Visually Editing Directories, Components and Files
To open the Setup Files Editor, from the View menu select Setup and then select Files.
The Setup Files Editor will look at all the WiX files in the project for the TARGETDIR Directory element or the DirectoryRef element. Once this is found then it will show the directories, components and files that will be installed.
The left hand side of the editor shows the files in a tree view. On the right hand side of the editor you can modify the properties of the currently selected item.
You can add directories, files and components to your installer by right clicking a tree node, selecting Add and then choosing an item to add.
Adding Directories
To add a directory and all its contents recursively to your setup, select the tree node where you want your directory added to, then right click and select Add Directory.
This opens the Browser for Folder dialog. Select the directory and then click OK to have that directory and all its contents added to the setup package. Every file added will have its own component.
Future Improvements
The WiX integration is not completely finished. Here is a list of items that will hopefully be added at some point.
Improve the WiX dialog designer. Add support for all the WiX controls.
Improve the files editor.
Drag and drop support.
Directory vs installer diff. Shows missing and new files.
Add support for WiX include files (.wxi).
Add GUI Editors for:
Features
Properties
Binaries
Icons
Sequences
Error and UI Text.
Alternatives
There are a few other applications and plug-ins available that can be used to create WiX installers instead of SharpDevelop. Here is a list of the ones I am aware of.
Votive
Votive is a Visual Studio plug-in that you can use to create WiX setup packages from inside Visual Studio.
Just a few days ago, September 15th, Justin Rockwood released Votive version 3, which supports Visual Studio 2005. It does not have a dialog designer, but that is on its list of features that will be added in the future.
WiX Edit
WiX Edit is a standalone WiX Editor application, created by Jasper Keuper, that you can use to create WiX setup packages. It includes a dialog designer along with a whole host of other features, that SharpDevelop does not have. In fact you can create an installer and never look at any XML.
WixTrim
WixTrim is a WiX Visual Editor, created by Oleg Zelenkov, that supports a very advanced dialog designer amongst other features. The source code for the editor is also available from GotDotNet. Unfortunately, WixTrim is not under active development like the previous two.
WiX Tutorial
If you want to learn more about WiX then a fantastic WiX tutorial, created by Gabor Deak Jahn, is available online.
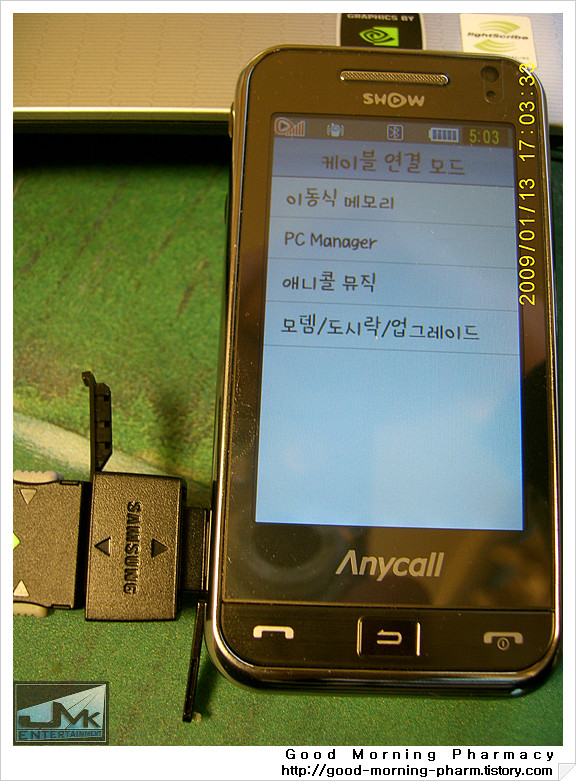
햅틱 2를 구매한지도 벌써 1개월이 넘었으므로 이젠 동영상도 한번 봐 볼때도 되었지요.
그래서 검색을 해보니 요 아래 유마일 인코더에 대한 글들이 제일 많은 것 같아서 이 프로그램으로 해보기로 했습니다. 곰 인코더 얘기도 더러 있긴 하지만, 유마일이 무료인데 반하여 곰인코더는 유료라더군요.
일단, 해 보는 것이 중요하니 무료고 사용하기 쉽다는 유마일을 사용합니다.
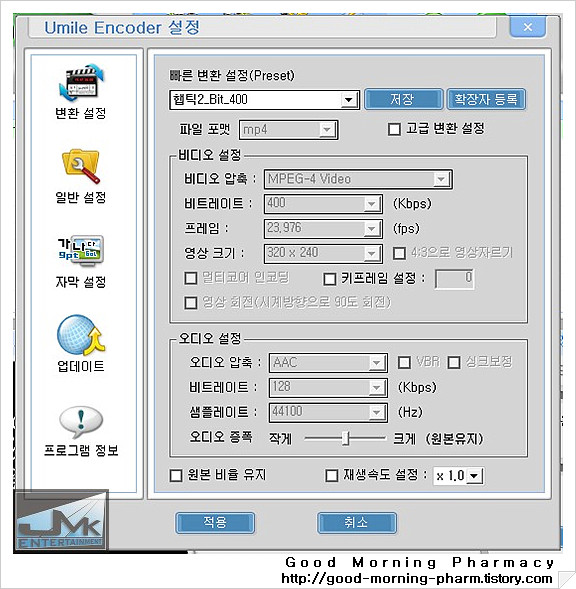
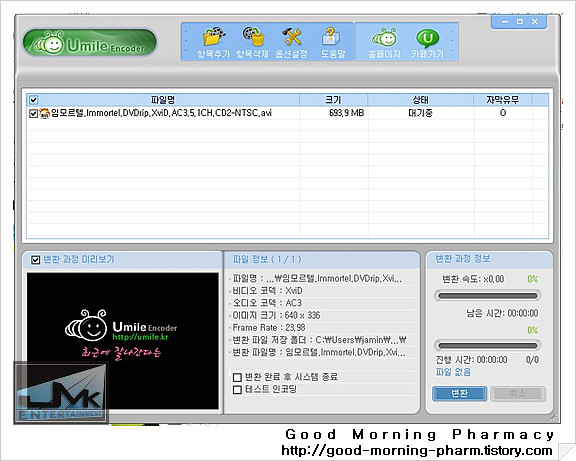
프로그램을 무료로 다운받아서 설치하고 실행하여 옵션설정을 선택하면 위 화면을 만날 수 있습니다.
고급변환설정을 클릭하면 설정을 변경할 수 있는데, 위 그림 설정치로 하면 무난하더랍니다.
" 햅틱2_Bit_400 "은 제가 개인적으로 붙힌 pre-set 이름이고요. 비트레이트는 500도 쓸만합니다.
좌측에 있는 나머지 아이콘들을 눌러서 자신이 원하는 설정으로 바꿀 수 있습니다.
마지막으로 적용버튼을 누르면 아래 화면으로 바뀝니다.
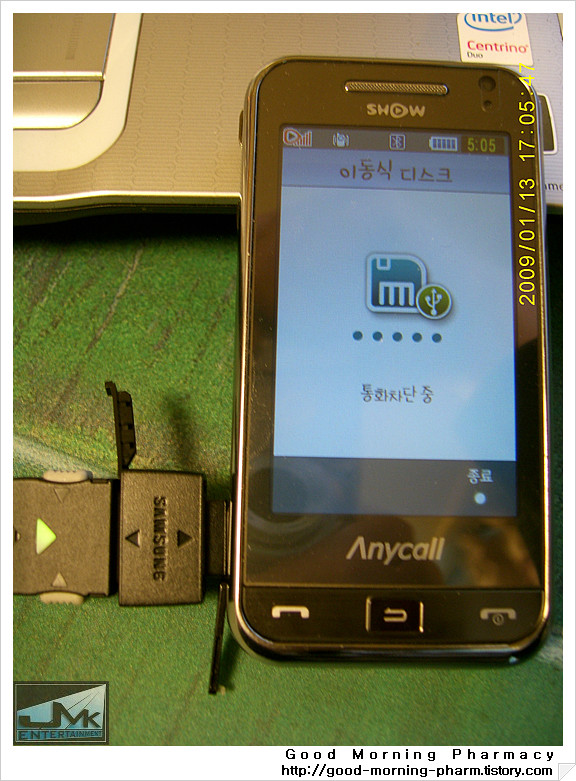
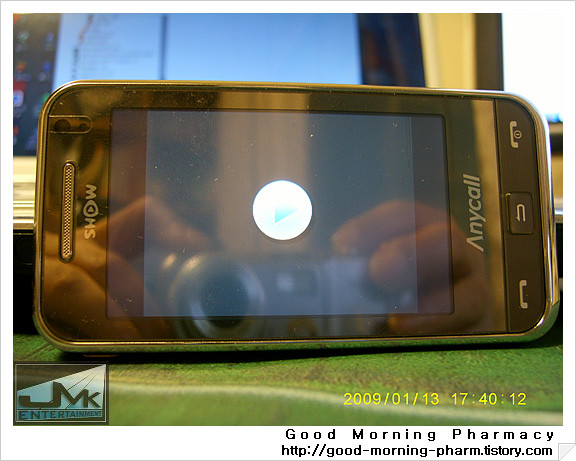
이제 "항목추가" 버튼을 이용하여 PC에 있는 동영상 파일을 불러와서 (물론, 자막 파일도 동영상 파일과 동일 폴더에 있어야 함은 당연) 우측 하단 "변환" 버튼을 누르면 일단 인코딩이 시작됩니다.
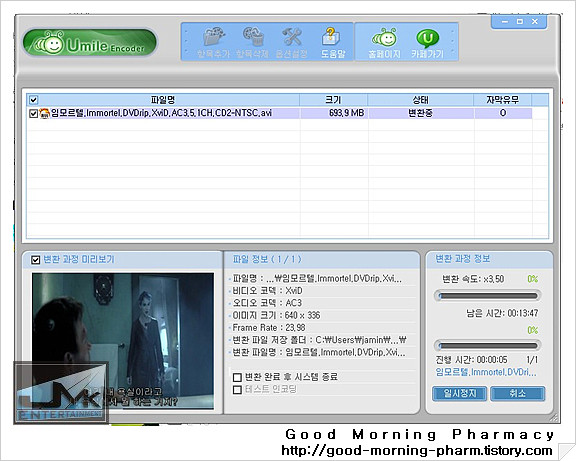
변환 도중이라도 변환 과정 미리보기 버튼을 클릭하면 영상과 자막이 돌아가는 모습을 볼 수 있습니다.
물론, 미리보기 화면에서는 모든 프레임이 다 보이는 것이 아니라 영상은 툭툭 끊어져 보이지만 이것은 정상입니다.
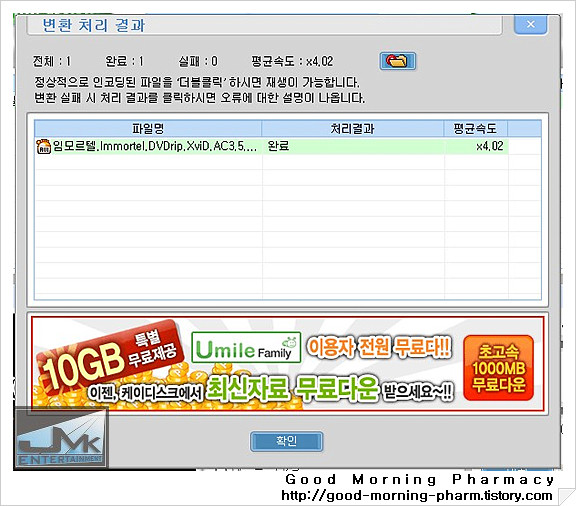
변환이 다 끝나면 위 그림처럼 완료 되었다고 나옵니다.
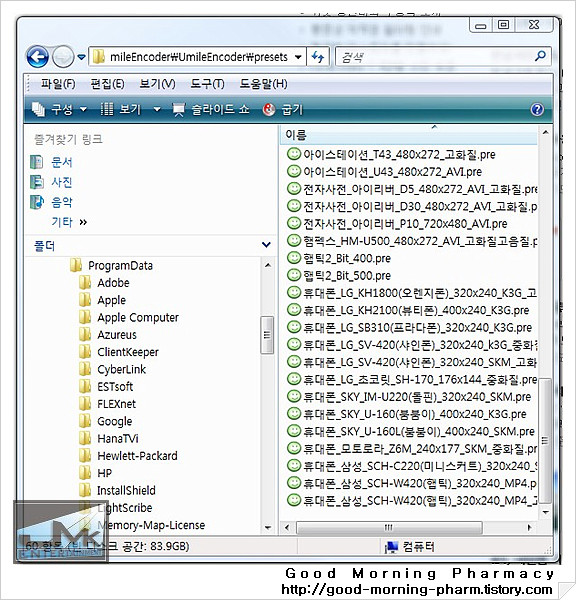
참고 1) 자신이 설정하고 이름붙힌 pre-set 목록을 지우려면 프로그램 내에서는 안되는 것 같고,
C:\Programdata\Umile\Umileencoder\Umileencoder\Presets에 보면 위 그림처럼 모든 목록이 보입니다. 요기서 불필요한 파일은 그냥 지우면 됩니다.
참고 2) AVI 파일 717,110KB와 719,509KB
2개를 변환시키면, 각각 246,966KB (Bit_500 기준), 189,115KB (Bit_400 기준) 로 변환됩니다.
시간도 각각 10분 정도 소요되고, 이 두 파일을 햅틱 2에 복사하는데도 10분쯤 걸리니까,,,,, 결론적으로 총 30분 정도가
소요됐습니다.
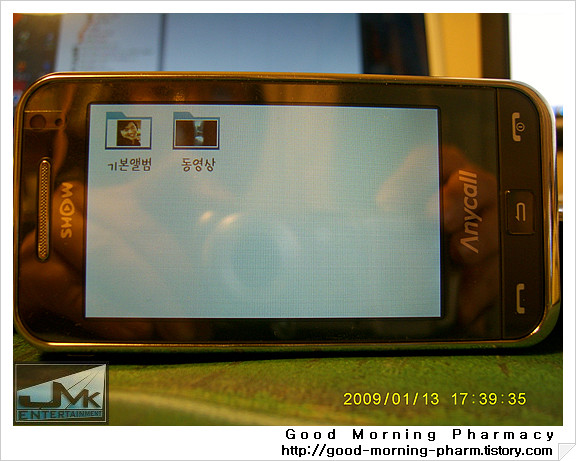
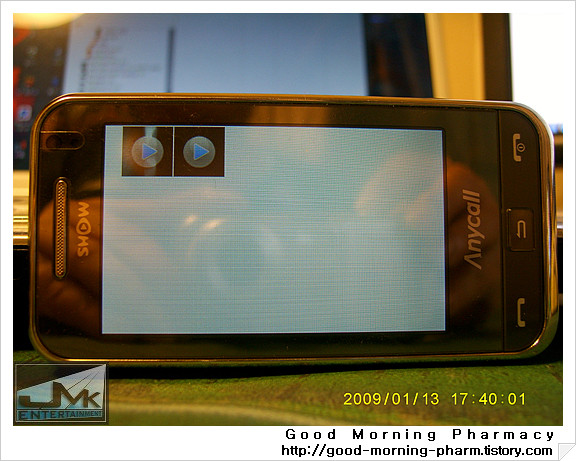
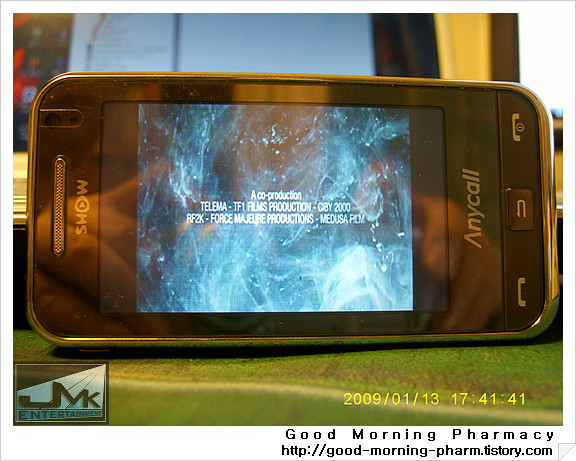
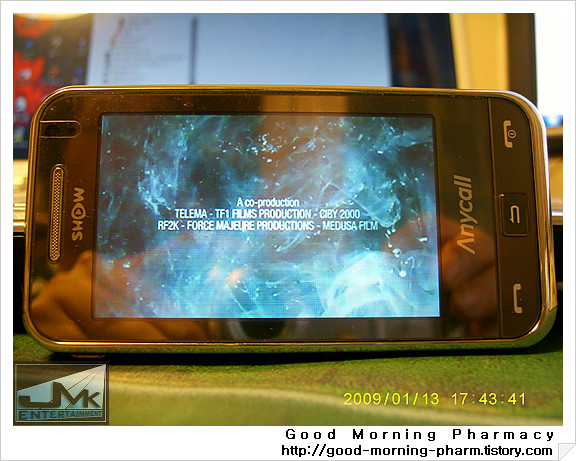
볼만합니다.
인코딩도 비교적 잘 되었고, 빠른 장면 전환시에도 끊김현상은 없습니다.
그런데, 자막글씨가 좀 작긴 합니다만..,화면이 작으니 어쩔 수 없겠지요.
소리는 참 맑게 잘 들리는데... 한참 보고 있으려니 좀 어지럽습니다.
작은 화면에 집중한다는 것이 쉽지는 않습니다.
또한 Mozilla 계열(Firefox, Netscape 등) 에서도 비슷하게 팝업창을 열 수 있습니다.
바로 window.open 을 할 때, modal=yes 라는 값을 추가하면 됩니다. 혹시 부모창이 닫힐 때 같이 닫히지 않는다면(테스트 결과 탭이 닫히는 것이 아닌 프로그램이 완전히 종료될때 닫힙니다), dependent=yes 라는 값을 추가로 주시기 바랍니다.
원래는 showModalDialog 와 같은 효과를 바라고 검색하다가 찾은건데 정작 제가 원했던 것은 아직 지원안되는 모양입니다. ^^a
위의 내용을 바탕으로 대충 구현한 함수는 다음과 같습니다.
차이점을 잘 모르겠다는 분들은 주소표시줄을 눈여겨 보세요. (^_^)
function modelessWindow(url, name, width, height){ if(window.showModelessDialog){ window.showModelessDialog(url, name,'dialogWidth:'+width+'px;dialogHeight:'+height+'px'); } else { var win =window.open(url, name,'height='+height+',width='+width+',toolbar=no,directories=no,status=no,linemenubar=no,scrollbars=no,resizable=no,modal=yes,dependent=yes'); } }
Find all Computers that are NT4.0 BDCs
(&(objectCategory=computer)(operatingSystemVersion=4*)(userAccountControl:1.2.840.113556.1.4.803:=8192))
Find all Computers that do not have a Description
(objectCategory=computer)(!description=*)
Find all Groups that have a Description
(objCategory=group)(description=*)
Find all Groups that start with QA or HD
(objectCategory=group)(|(cn=QA*)(cn=HD*))
Find all Objects where Department, Company or Description is Sales
(|(department=Sales)(company=Sales)(description=Sales))
Find all Users created after 01.08.2004
(objectCategory=user)(whenCreated>=20040801000000.0Z)
Find all Users except Sara
(objectCategory=user)(!cn=sara*)
Find all Users that are almost Locked-Out
(objectCategory=user)(badPwdCount>=2)
Find all Users that are Disabled
(&(objectCategory=person)(objectClass=user)(userAccountControl:1.2.840.113556.1.4.803:=2))
Find all Users that are members of QA Users Group in the Help Desk OU in the tools4ever.local domain
(objectCategory=user)(memberOf=CN=QA Users,OU=Help Desk,DC=tools4ever,DC=local)
Find all Users that have an E-Mail Address (not Exchange related)
(objectClass=user)(email=*)
Find all Users that have not changed password since 05.02.2004
(&(objectCategory=person)(objectClass=user)(pwdLastSet>=127204308000000000))
Look below for a .vbs script to convert a date to an integer8 value.
Find all Users that must change password at next logon
(objectCategory=user)(pwdLastSet=0)
Find all Users with Dial-In permissions
(objectCategory=user)(msNPAllowDialin=TRUE)
Find all Users with First Name of David
(objectcategory=user)(cn=David*)
Find all Users with First Name of David or Dana
(objectcategory=user)(|(cn=David*)(cn=Dana*))
Find all Users with Mobile numbers 050 or 051
(objectcategory=user)(|(mobile=050*)(mobile=051*))
Find all Users with Password Never Expires set
(objectcategory=user)(userAccountControl:1.2.840.113556.1.4.803:=65536)
Find all Users, Groups or Contacts where Company or Description is North
(|(objectcategory=user)(objectcategory=group)(objectcategory=contact))(|(description=North*)(company=North*))
Code:
' DateToInteger8.vbs
' VBScript program demonstrating how to convert a datetime value to
' the corresponding Integer8 (64-bit) value. The Integer8 value is the
' number of 100-nanosecond intervals since 12:00 AM January 1, 1601,
' in Coordinated Universal Time (UTC). The conversion is only accurate
' to the nearest second, so the Integer8 value will always end in at
' least 7 zeros.
'
' ----------------------------------------------------------------------
' Copyright (c) 2004 Richard L. Mueller
' Hilltop Lab web site - http://www.rlmueller.net
' Version 1.0 - June 11, 2004
'
' You have a royalty-free right to use, modify, reproduce, and
' distribute this script file in any way you find useful, provided that
' you agree that the copyright owner above has no warranty, obligations,
' or liability for such use.
Option Explicit
Dim dtmDateValue, dtmAdjusted, lngSeconds, str64Bit
Dim objShell, lngBiasKey, lngBias, k
If Wscript.Arguments.Count <> 1 Then
Wscript.Echo "Required argument <DateTime> missing"
Wscript.Echo "For example:"
Wscript.Echo ""
Wscript.Echo "cscript DateToInteger8.vbs ""2/5/2004 4:58:58 PM"""
Wscript.Echo ""
Wscript.Echo "If the date/time value has spaces, enclose in quotes"
Wscript.Quit
End If
dtmDateValue = CDate(Wscript.Arguments(0))
' Obtain local Time Zone bias from machine registry.
Set objShell = CreateObject("Wscript.Shell")
lngBiasKey = objShell.RegRead("HKLM\System\CurrentControlSet\Control\" _
& "TimeZoneInformation\ActiveTimeBias")
If UCase(TypeName(lngBiasKey)) = "LONG" Then
lngBias = lngBiasKey
ElseIf UCase(TypeName(lngBiasKey)) = "VARIANT()" Then
lngBias = 0
For k = 0 To UBound(lngBiasKey)
lngBias = lngBias + (lngBiasKey(k) * 256^k)
Next
End If
' Convert datetime value to UTC.
dtmAdjusted = DateAdd("n", lngBias, dtmDateValue)
' Find number of seconds since 1/1/1601.
lngSeconds = DateDiff("s", #1/1/1601#, dtmAdjusted)
' Convert the number of seconds to a string
' and convert to 100-nanosecond intervals.
str64Bit = CStr(lngSeconds) & "0000000"
Wscript.Echo "Integer8 value: " & str64Bit
const KEY_QUERY_VALUE = &H0001
const KEY_SET_VALUE = &H0002
const KEY_CREATE_SUB_KEY = &H0004
const DELETE = &H00010000


const HKEY_LOCAL_MACHINE = &H80000002

strComputer = "."
Set StdOut = WScript.StdOut

Set oReg=GetObject("winmgmts:{impersonationLevel=impersonate}!\\" &_
strComputer & "\root\default:StdRegProv")

strKeyPath = "SYSTEM\CurrentControlSet"


oReg.CheckAccess HKEY_LOCAL_MACHINE, strKeyPath, KEY_QUERY_VALUE, _
    bHasAccessRight
If bHasAccessRight = True Then
    StdOut.WriteLine "Have Query Value Access Rights on Key"
Else
    StdOut.WriteLine "Do Not Have Query Value Access Rights on Key"
End If

oReg.CheckAccess HKEY_LOCAL_MACHINE, strKeyPath, KEY_SET_VALUE, _
    bHasAccessRight
If bHasAccessRight = True Then
    StdOut.WriteLine "Have Set Value Access Rights on Key"
Else
    StdOut.WriteLine "Do Not Have Set Value Access Rights on Key"
End If

oReg.CheckAccess HKEY_LOCAL_MACHINE, strKeyPath, KEY_CREATE_SUB_KEY, _
    bHasAccessRight
If bHasAccessRight = True Then
    StdOut.WriteLine "Have Create SubKey Access Rights on Key"
Else
    StdOut.WriteLine "Do Not Have Create SubKey Access Rights on Key"
End If

oReg.CheckAccess HKEY_LOCAL_MACHINE, strKeyPath, DELETE, bHasAccessRight
If bHasAccessRight = True Then
    StdOut.WriteLine "Have Delete Access Rights on Key"
Else
    StdOut.WriteLine "Do Not Have Delete Access Rights on Key"
End If
Uses WMI to check access rights for the logged on user to HKLM\SYSTEM\CurrentControlSet.
const KEY_QUERY_VALUE = &H0001
const KEY_SET_VALUE = &H0002
const KEY_CREATE_SUB_KEY = &H0004
const DELETE = &H00010000


const HKEY_LOCAL_MACHINE = &H80000002

strComputer = "."
Set StdOut = WScript.StdOut

Set oReg=GetObject("winmgmts:{impersonationLevel=impersonate}!\\" &_
strComputer & "\root\default:StdRegProv")

strKeyPath = "SYSTEM\CurrentControlSet"


oReg.CheckAccess HKEY_LOCAL_MACHINE, strKeyPath, KEY_QUERY_VALUE, _
    bHasAccessRight
If bHasAccessRight = True Then
    StdOut.WriteLine "Have Query Value Access Rights on Key"
Else
    StdOut.WriteLine "Do Not Have Query Value Access Rights on Key"
End If

oReg.CheckAccess HKEY_LOCAL_MACHINE, strKeyPath, KEY_SET_VALUE, _
    bHasAccessRight
If bHasAccessRight = True Then
    StdOut.WriteLine "Have Set Value Access Rights on Key"
Else
    StdOut.WriteLine "Do Not Have Set Value Access Rights on Key"
End If

oReg.CheckAccess HKEY_LOCAL_MACHINE, strKeyPath, KEY_CREATE_SUB_KEY, _
    bHasAccessRight
If bHasAccessRight = True Then
    StdOut.WriteLine "Have Create SubKey Access Rights on Key"
Else
    StdOut.WriteLine "Do Not Have Create SubKey Access Rights on Key"
End If

oReg.CheckAccess HKEY_LOCAL_MACHINE, strKeyPath, DELETE, bHasAccessRight
If bHasAccessRight = True Then
    StdOut.WriteLine "Have Delete Access Rights on Key"
Else
    StdOut.WriteLine "Do Not Have Delete Access Rights on Key"
End If
This step-by-step article describes how to retrieve a value from the registry. This article also describes how to use this value in a setup project that you create by using Visual Studio .NET.
The examples in this article describe how to retrieve the MediaPath value for your computer from the registry, and then install your application to a folder that is located in the folder that your MediaPath value specifies.
Use the Retrieved Value to Change Your Installation Path
To change your installation path based on the value of your MediaPath property, change the value of the DefaultLocation property for your application folder. To do this, follow these steps:
Switch to the File System Editor.
Under File System on Target Machine, click Application Folder.
On the View menu, click Properties Window to select the Properties window for Application Folder.
To change your installation path based on the value of your MediaPath property, change the DefaultLocation property value to [MEDIA_PATH]\MyApp.
When you run the setup project, this value causes Setup to install your application to the MyApp folder in your Media folder. For example, if your MediaPath value is C:\WINDOWS\Media, Setup installs MyApp to the C:\WINDOWS\Media\MyApp folder.
Note Notice that MEDIA_PATH is enclosed in square brackets in the property value. When you reference a property in any property other than a Condition property, enclose your original property in square brackets.
Locate the Setup.exe file that you built in step 1.
Setup.exe is located in a folder named Debug. The Debug folder is located in the MyApp folder where you created your MyApp setup project in the "Create a Setup Project" section of this article.
Run the Setup.exe file.
On the Welcome to the MyApp Setup Wizard page, click Next.
On the Select Installation Folder page, notice that the Folder text box contains your customized installation path. For example, if your MediaPath value is C:\WINDOWS\Media, the Folder text box contains C:\WINDOWS\Media\MyApp\. Click Next.
On the Confirm Installation page, click Next to install MyApp.
On the Installation Complete page, click Close to quit your installation.
In Windows Explorer, locate the folder where you installed MyApp.
Note The path of this folder appeared in the Folder text box in step 6.
Notice that the Readme.txt file is located in this folder.
Open the Readme.txt file.
Notice that the Readme.txt file contains the text that you typed in step 1b of the "Add a File to Your Setup Project" section of this article.
The DBMS_JOB package has all kinds of useful applications waiting to be discovered. DBAs can schedule jobs that look for problem conditions in the database or track and record resource utilization. Developers can schedule large batch operations at off hours without requiring operator intervention.
I decided to implement a very simple tracking system that can be used to track the growth of data in tablespaces. Such a system could be used for capacity planning or to trigger an alert of impending space problems.
The system consists of a table called db_space, a view called tbs_space, and a procedure called space_logger. Here is the source code for the system:
/* Filename on companion disk: job6.sql */*
CREATE TABLE db_space
   (tablespace_name   VARCHAR(30)  NOT NULL
   ,calc_date      DATE    NOT NULL
   ,total_bytes    NUMBER  NOT NULL
   ,free_bytes     NUMBER  NOT NULL);

CREATE OR REPLACE VIEW tbs_space
   (tablespace_name
   ,total_bytes
   ,free_bytes)
AS
   SELECT  DF.tbsname         tablespace_name
          ,DF.totbytes        total_bytes
          ,FS.freebytes       free_bytes
     FROM
          (SELECT  tablespace_name     tbsname
                  ,SUM(bytes)          totbytes
             FROM  dba_data_files
            GROUP BY tablespace_name
          ) DF
         ,(SELECT  tablespace_name     tbsname
                  ,SUM(bytes)          freebytes
             FROM  dba_free_space
            GROUP BY tablespace_name
          ) FS
    WHERE
          DF.tbsname = FS.tbsname;


CREATE OR REPLACE PROCEDURE space_logger
AS
   /*
   || records total size and free space for all
   || tablespaces in table db_space
   ||
   || Author:  John Beresniewicz, Savant Corp
   ||
   || 01/26/98: created
   ||
   || Compilation requirements:
   ||
   || SELECT on TBS_SPACE view
   || INSERT on DB_SPACE table
   */
   CURSOR tbs_space_cur
   IS
   SELECT tablespace_name, total_bytes, free_bytes
     FROM tbs_space;

BEGIN
   FOR tbs_space_rec IN tbs_space_cur
   LOOP
      INSERT INTO db_space VALUES
         (tbs_space_rec.tablespace_name
         ,SYSDATE
         ,tbs_space_rec.total_bytes
         ,tbs_space_rec.free_bytes);
   END LOOP;
   COMMIT;
END space_logger;
To set the system in motion, the space_logger procedure can be submitted to the job queue for regular execution as follows:
Each time space_logger executes, it records total space, free space, tablespace name, and a timestamp for each tablespace in the database. Adjusting the interval parameter for the job adjusts the frequency of data collection.
Charles Dye recommended the next example, probably based on his experiences with replication. When jobs have relatively complex execution requirements in terms of the database objects on which they depend, they can easily become broken by incurring multiple execution failures. Perhaps the DBA has modified some database links or recreated tables or views, and the job's definition has been temporarily compromised. Well, it's a pain to manually reset the broken flag for these "not really broken" jobs, so why not have a job that regularly tries to unbreak jobs? Sounds good to me; here is a procedure called job_fixer to do just that:
/* Filename on companion disk: job5.sql */*
CREATE OR REPLACE PROCEDURE job_fixer
AS
   /*
   || calls DBMS_JOB.BROKEN to try and set
   || any broken jobs to unbroken
   */

   /* cursor selects user's broken jobs */
   CURSOR broken_jobs_cur
   IS
   SELECT job
     FROM user_jobs
    WHERE broken = 'Y';

BEGIN
   FOR job_rec IN broken_jobs_cur
   LOOP
      DBMS_JOB.BROKEN(job_rec.job,FALSE);
   END LOOP;
END job_fixer;
The job_fixer procedure works only on a user's own jobs, so each user submitting jobs to the queue will need a separate job_fixer in the queue.
The ability to reference the job, next_date, and broken parameters in the job definition allows the procedure executed to alter its own job characteristics. Thus, a job could remove itself from the job queue, or assign its own next execution date based on some criteria decided at runtime by the procedure itself. I've written a small skeleton procedure that demonstrates this capability. It is called smart_job, and makes use of all three of the referenceable parameters when submitted as a job.
When submitted to the job queue, smart_job uses the job definition parameters to modify itself in the following ways:
Reschedules itself to parm1_IN minutes after finishing if parm2_IN = "RESTART"
Sets next_date NULL causing automatic removal from queue if parm2_IN != "RESTART"
Flags itself as broken if any exceptions are encountered
Uses the job number to raise an exception
Pay close attention to how the smart_job procedure modifies itself. It uses the fact that the next_date and broken parameters support both IN and OUT modes when referenced by the job definition. Thus, when the broken_out parameter of smart_job has the broken parameter assigned to it in the call to DBMS_JOB.SUBMIT, the value set for broken_out by the procedure gets set for the job by the job queue when the job completes. In this way, smart_job changes its job characteristics without calling any DBMS_JOB procedures.
Here is the source code for smart_job:
/* Filename on companion disk: job4.sql */*
PROCEDURE smart_job
   (parm1_IN IN INTEGER
   ,parm2_IN IN VARCHAR2
   ,next_date_OUT IN OUT DATE
   ,broken_OUT IN OUT BOOLEAN
   ,job_IN IN INTEGER := -1)
IS
   /* declare an exception for testing */
   JOB_LESSTHAN_100  EXCEPTION;

BEGIN
   /*
   || Do the procedure main line functions
   */
   null;

   /*
   || use job_IN to branch to exception handler
   || for testing self-breaking
   */
   IF job_IN < 100
   THEN
      RAISE JOB_LESSTHAN_100;
   END IF;

   /*
   || After main processing is finished, job decides
   || if it should re-execute and determines its own
   || next execution date by adding parm1_IN minutes to
   || the current time
   */
   IF parm2_IN = 'RESTART'
   THEN
      next_date_OUT := SYSDATE + parm1_IN/1440;
   ELSE
      /*
      || NULL next_date will cause automatic removal of
      || job from queue
      */
      next_date_OUT := NULL;
   END IF;

EXCEPTION
   /*
   || job "breaks" itself if unexpected error occurs
   */
   WHEN OTHERS
   THEN
      broken_OUT := TRUE;

END smart_job;
The following test script exercises smart_job:
/* Filename on companion disk: job4.sql */*
var jobno NUMBER
BEGIN
   /*
   || Test the ability to modify next_date.
   */
   DBMS_JOB.SUBMIT
      (:jobno
      ,'smart_job(180,''RESTART'',next_date,broken,job);'
      ,SYSDATE + 1/1440
      ,'SYSDATE + 1');

   COMMIT WORK;
END;
/
print jobno

BEGIN
   /*
   || Test the ability to autoremove
   */
   DBMS_JOB.SUBMIT
      (:jobno
      ,'smart_job(180,''NO_RESTART'',next_date,broken,job);'
      ,SYSDATE + 1/1440
      ,'SYSDATE + 1');

   COMMIT WORK;
END;
/
print jobno

BEGIN
   /*
   || Test the ability to break itself.
   */
   DBMS_JOB.ISUBMIT
      (99
      ,'smart_job(180,''RESTART'',next_date,broken,job);'
      ,SYSDATE + 1/1440
      ,'SYSDATE + 1');

   COMMIT WORK;
END;
/
After executing the test script in SQL*Plus, the following jobs are in the queue:
SQL> SELECT job,last_date,next_date,broken FROM user_jobs;


JOB       LAST_DATE           NEXT_DATE           B
--------- ------------------- ------------------- -
      307                     1997:11:25:11:50:39 N
      308                     1997:11:25:11:50:39 N
       99                     1997:11:25:11:50:40 N
A few minutes later, the job queue looks like this:
SQL> SELECT job,last_date,next_date,broken FROM user_jobs;

JOB       LAST_DATE           NEXT_DATE           B
--------- ------------------- ------------------- -
      307 1997:11:25:11:50:42 1997:11:25:14:50:42 N
       99 1997:11:25:11:50:42 1997:11:26:11:50:42 Y
The tests worked! Job 308 ran once and was removed from the queue for having a NULL next_date. Job 307 ran and rescheduled itself three hours later, which is different from the interval specified in the call to DBMS_JOB.SUBMIT. Finally, job 99 set itself to broken status because its job number was less than 100.
여기서 설명할 것은 패키지하는 방법과 사용법이다.
일반적으로 그냥 프로시저만을 사용하는 경우가 많으나(나도 그렇지만..), 패키지하여 사용하는 것이
여러 부분에서 우월하므로 왠만하면 패키지화하는 습관을 들이는 것이 좋겠다. 뒷부분에 설명하겠다.
함수의 생성과 사용
프로시저는 뭐고 함수는 또 뭔가?
함수는 리턴값이 있고, 프로시저는 없다. 사실 프로시저도 리턴값을 패러미터로 받을 순 있다.
C언어에서의 call by reference정도로 생각하면 되겠다.
현재시간을 알아보게 싶게 2002-9-19과 같이 리턴하는 함수를 만들어 보자.
SQL> create or replace function print_date return varchar is
2 cur_date varchar(15);
3 begin
4 select to_char(sysdate, 'YYYY-MM-DD') into cur_date from dual;
5 return cur_date;
6 end print_date;
7 /
함수는 위와 같이 사용하면 되겠다. 별다른 설명은 필요없으리라 본다.
그럼 프로시저를 보자.
프로시저의 생성과 사용
test라는 테이블에 데이터를 insert하는 프로시저를 생성하자.
프로시저는 insert, update, delete등에 사용하면 적절하겠다.
SQL> create table test
2 (id varchar(10), name varchar(10));
테이블이 생성되었습니다.
SQL> create or replace procedure insert_test
2 (
3 v_id IN TEST.ID%type, -- ID
4 v_name IN TEST.NAME%type -- 이름
5 )
6 is
7 begin
8 insert into test(id, name) values(v_id, v_name);
9 commit;
10 end;
11 /
프로시저가 생성되었습니다.
SQL> exec insert_test('maddog', '강명규');
PL/SQL 처리가 정상적으로 완료되었습니다.
SQL> select * from test;
ID NAME
---------- ----------
maddog 강명규
SQL> rollback;
롤백이 완료되었습니다.
SQL> select * from test;
선택된 레코드가 없습니다.
SQL>
데이터입력값의 유효성체크와 이에 따른 commit,rollback등 에러처리 추가해 주면 더욱 좋을 것이다.
전체 테이블컬럼을 참조한다면 위의 type대신 rowtype을 사용하는 것도 고려해볼만 하겠다.
예제라 간단하게 했는데, 부족함을 느낀다면 .. 음.. 스스로 하도록 하자.
패키지의 사용
위에서 만든 함수와 프로시저를 하나의 패키지에 담도록 하자.
사실 관련있는 놈들끼리 패키지화 해야 하는데.. 어디까지나 예제이므로 그냥 해 보겠다.
SQL> create or replace package pkg_dbakorea
2 as
3 procedure insert_test(v_id IN TEST.ID%type, v_name IN TEST.NAME%type);
4 function print_date return varchar;
5 end;
6 /
패키지가 생성되었습니다.
SQL> create or replace package body pkg_dbakorea
2 as
3 procedure insert_test
4 (
5 v_id IN TEST.ID%type, -- ID
6 v_name IN TEST.NAME%type -- 이름
7 )
8 is
9 begin
10 insert into test(id, name) values(v_id, v_name);
11 commit;
12 end;
13
14 function print_date return varchar is
15 cur_date varchar(15);
16 begin
17 select to_char(sysdate, 'YYYY-MM-DD') into cur_date from dual;
18 return cur_date;
19 end print_date;
20
21 end;
22 /
프로시저에 비해 패키지가 왜 우월한가 의문을 가지고 따질 사람이 있을 수 있으므로 함 따져보자.
모듈화
애플리케이션 디자인 용이함
Information Hiding
추가된 기능성
더 좋은 성능
프로시저A는 프로시저B를 호출하는 코드를 가진다고 하자.
그런데 프로시저B의 코드가 변경되면 어떻게 되는가?
프로시저A는 프로시저B의 변경에 영향을 받으므로 재컴파일되어야 한다. 귀찮겠다.
그럼, 패키지를 사용하면 어떻길래? 따지냐.. --; 이주일씨의 명복을 빕니다.
프로시저A를 포함한 패키지PKG_A와 프로시저B를 가진 패키지PKG_B가 있고
PKG_A는 PKG_B의 스펙에 대한 의존성을 가진다고 하자.
이 경우에서, PKG_B의 스펙이나 인터페이스에 대한 변경이 아니라면 PKG_B의 BODY는 PKG_A에 상관없이 변경될 수 있다.
SQL> create or replace procedure B
2 as
3 begin
4 null;
5 end;
6 /
프로시저가 생성되었습니다.
SQL> create or replace procedure A
2 as
3 begin
4 B;
5 end;
6 /
프로시저가 생성되었습니다.
SQL>
위에서 보듯, 프로시저A는 프로시저B를 호출하고 있다. 즉, 의존성을 가지고 있겠다.
당연히, 프로시저B를 먼저 생성한 다음 프로시저A를 생성해야 한다. 반대로 해볼까?
SQL> drop procedure B;
프로시저가 삭제되었습니다.
SQL> drop procedure A;
프로시저가 삭제되었습니다.
SQL> create or replace procedure A
2 as
3 begin
4 B;
5 end;
6 /
경고: 프로시저 생성시 컴파일 오류가 발생했습니다.
SQL> drop procedure a;
프로시저가 삭제되었습니다.
SQL>
위에서 보듯이 안된다.
그럼.. 무엇을 말하려고? 음.. 패키지는 그렇지 않다는 것이다.
SQL> create or replace package pkg_a
2 as
3 procedure a;
4 end;
5 /
패키지가 생성되었습니다.
SQL> create or replace package pkg_b
2 as
3 procedure b;
4 end;
5 /
패키지가 생성되었습니다.
SQL>
위에서 패키지에 대한 스펙을 생성했다.
스펙의 생성순서는 상관이 없고 서로 의존성도 가지지 않는다.
그럼 패키지 body를 생성해 보자.
SQL> create or replace package body pkg_a
2 as
3 procedure a
4 is
5 begin
6 pkg_b.b;
7 end;
8 end;
9 /
패키지 본체가 생성되었습니다.
SQL> create or replace package body pkg_b
2 as
3 procedure b
4 is
5 begin
6 null;
7 end;
8 end;
9 /
패키지 본체가 생성되었습니다.
설명 필요없겠다. 위에서 보듯 생성순서는 상관이 없다.
패키지A에 있는 프로시저A는 패키지B의 프로시저B를 호출하고 있지만,
이 시점에서 패키지B의 프로시저B는 존재하지 않는다. 하지만, 상관없다는 것을 알 수 있다.
다시 말하면, 패키지의 스펙에 의존하지만, 패키지의 body에는 의존하지 않음을 알 수 있다.
SQL> col object_type format a15
SQL> col object_name format a10
SQL> col status format a10
SQL> select object_type, object_name, status
2 from user_objects
3 where status = 'INVALID'
4 order by object_type, object_name;
선택된 레코드가 없습니다.
SQL>
그럼 실제 프로시저와 패키지가 변경해서 위에서 말한 내용이 사실인지 확인해 보자.
SQL> create or replace procedure B
2 as
3 begin
4 null;
5 end;
6 /
프로시저가 생성되었습니다.
SQL> create or replace procedure A
2 as
3 begin
4 B;
5 end;
6 /
프로시저가 생성되었습니다.
SQL> create or replace procedure b
2 as
3 begin
4 null;
5 end;
6 /
프로시저가 생성되었습니다.
SQL> select object_type, object_name, status
2 from user_objects
3 where status = 'INVALID'
4 order by object_type, object_name;
OBJECT_TYPE OBJECT_NAM STATUS
--------------- ---------- ----------
PROCEDURE A INVALID
SQL> create or replace package body pkg_b
2 as
3 procedure b
4 is
5 begin
6 null;
7 end;
8 end;
9 /
패키지 본체가 생성되었습니다.
SQL> select object_type, object_name, status
2 from user_objects
3 where status = 'INVALID'
4 order by object_type, object_name;
OBJECT_TYPE OBJECT_NAM STATUS
--------------- ---------- ----------
PROCEDURE A INVALID
SQL>
위에서 보듯이 프로시저는 변경에 대해 민감하고(?), 패키지는 둔하다.
고로 패키지가 더 flexible하다 할 수 있겠다.
SIP(Session Initiation Protocol)은 인터넷 상에서 통신하고자 하는 지능형 단말(전화, 인터넷 콘퍼런스, 인스턴트 메신저 등)들이 서로를 식별하여 그 위치를 찾고, 그들 상호 간에 멀티미디어 통신 세션을 생성하거나 삭제 또는 변경하기 위한 절차를 명시한 응용 계층의 시그널링 프로토콜이다.
인터넷 기반 회의, 전화, 음성 메일, 이벤트 통지, 인스탄트 메시징 등 멀티미디어 서비스 세션의 생성, 수정, 종료를 제어하는 request/response 구조로서 TCP와 UDP에 모두 사용할 수 있으며, 각 사용자들을 구분하기 위해 이메일 주소와 비슷한 SIP URL을 사용함으로써 IP주소에 종속되지 않고 서비스를 제공받는다. HTTP와 SMTP의 많은 부분을 그대로 사용하여 개발된 텍스트 기반이므로 구현이 용이하며, 인터넷에서 사용되는 다른 많은 프로토콜과 결합하여 다양한 서비스들을 만들 수 있는 유연성과 확장성이 있다. ITU-T의 H.323에 대응되는 보다 간편한 프로토콜로, 1999년에 IETF MMUSIC (Multiparty Multimedia Session Control) 워킹 그룹에 의해 RFC 2543으로 제안된 이후 별도로 분리된 ITEF SIP 워킹 그룹에서 개정 작업을 진행하여 2002년 7월 RFC3261 표준이 제정되었다.


 Back to the top


 invalid-file
voipen said
I opened a ticket w/ Microsoft and here is their answer I received in bold. Basically The RTC Team reassigned the purpose of ContactID and removed the OnSelectionChange Function. So there are no more dymanic tabs in which you can send the contact SIP URI to a webpage and update your tab – now there is only static web pages . Also the OCS R2 documentation is incorrect in that it states OnSelectionChange is still avaiable but it is not. Also RTC went back to using GET and POST statements on the Contact Cards which open up a web browser.
Microsofts Replies
The Communicator R2 client tab functionality has changed from what it was in Communicator 2007. In OC 2007 you could pass the contactID parameter to tabs that were listed at the bottom of the Communicator contacts display. Microsoft has changed the use of tabs in OC 2007 R2 such that you can only display static tabs at the bottom of the Communicator contacts display area. The previous functionality has been moved to the tabs at the bottom of the contact card for each user. So if you wanted to access contact sensitive data you need right-click on the user and choose “View Contact card”.
See Configuring Custom Tabs in Communicator 2007 R2
ELEMENT contactid (“true” | “false”)
Determines whether the tab appears in the contact card. Tabs defined without contactid or with contactid=false will appear only in the Communicator window. Tabs defined with contactid=true will appear in the contact card, and Communicator will pass the selected contact to the defined page. The default value is “false.”
If you have set
true => the tabs that would normally be present at the bottom of the OC 2007 display area is now moved to the contactcards, and then the contact sip URI will be passed to the tabs that now appear in the contact card.
Here is a statement from RTC Core:
In R2 the extensibility of Communicator enforces a more strictly defined user experience. In our product roadmap going forward, the Contact Card will gain prominence, and in order to prepare for those upcoming changes, we slightly modified the API behavior of the Custom tabs to display tabs using the ContactId=true to appear in the Contact Card and to be contact specific.
Mino said
Thanks for this very good update